Distilling Water for Finicky Plants
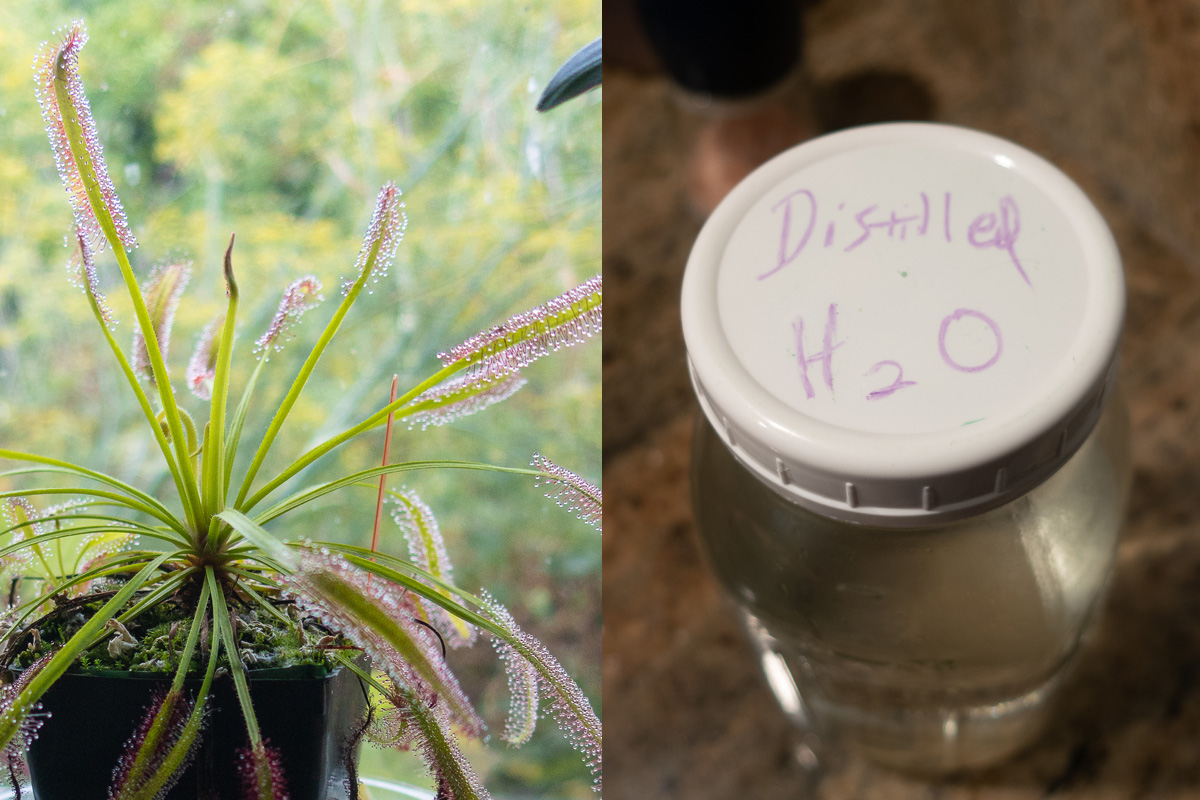

When I wrote a while back about the Carnivourous Plants Store in Half Moon Bay, I mentioned that we took home a sundew for ourselves. Our cool little plant monster happily enjoyed some fruit flies and ants as snacks, and we kept the dish below the plant full of water to resemble a sundew’s naturally swampy lifestyle. What we didn’t know then, was that the water from the Hetch Hetchy Reservoir (which supplies Brisbane as well as San Francisco with drinking water) contains lime, and lime is bad for bog plants.
My plant was starting to flower–a LOT–and look a little sickly, so I deduced the water was to blame and started using rainwater instead. Rainwater is great, when it’s raining, or, if you have a good system for storing it, but I know that when the rains stop in late spring, I’m going to need a new way to get water for my sundew. And, in our home, buying bottled distilled water is not something we plan to start doing: too much waste and travel go into bottled water, distilled or otherwise. Nor do we plan to buy a filtration system that uses a reverse osmosis method, since they are expensive. So, I decided to go for distilling water myself.
Water distillation is actually very simple, and understanding it is great not just for getting water for carnivorous plants: it’s also a survival skill. When I was researching how to best achieve it, most of the videos I found were from doomsday preppers and survivalists. Distilling can turn the dirtiest of liquids into clean, drinkable water, and that may be important if any kind of disaster strikes.
To distill water, you need to heat water into a vapor, and then collect that vapor when it condenses back into water. There are a few basic methods you can do easily at home with equipment you already have.
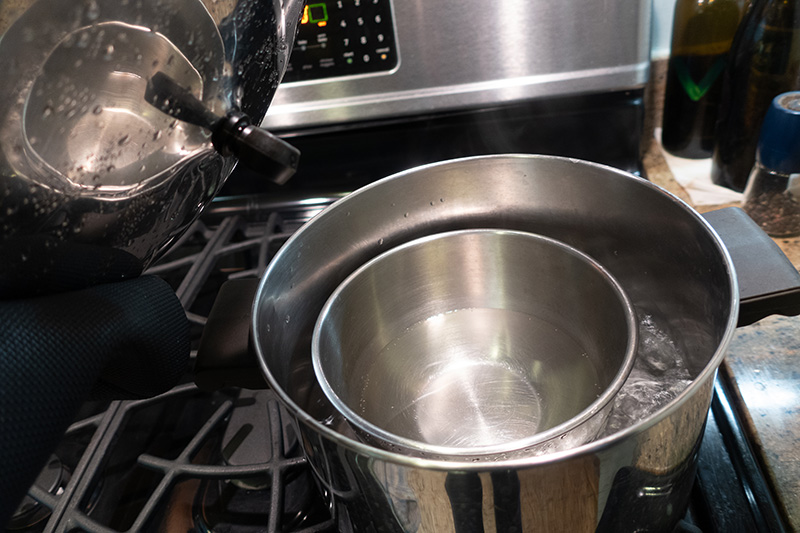
DIY Stovetop Distiller
You’ll need:
- a large pot
- a smaller heat-proof vessel that fits nicely inside the pot
- a lid, preferably with a handle
- ice
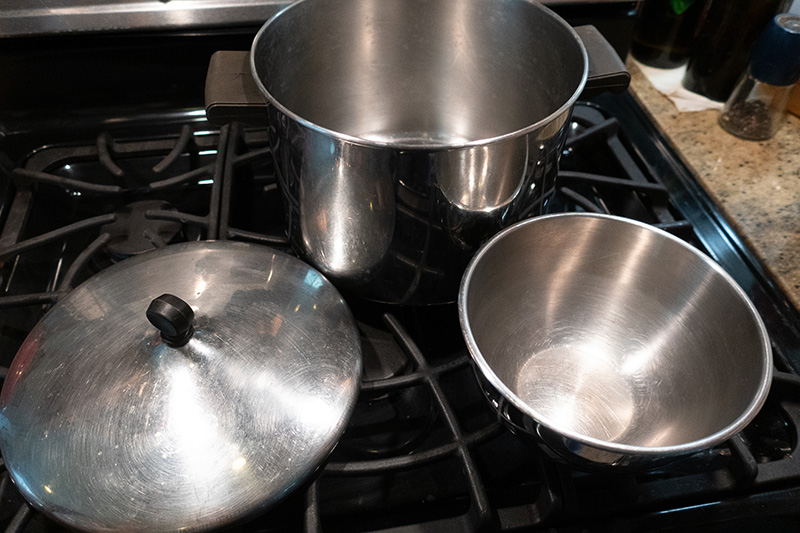
Fill the pot at least 1/3 of the way up with water. Place the smaller vessel in the pot, either on the top of the water or resting on something that keeps in place inside (this item must ALSO be heat-proof). If it is floating on the water, make sure that even if it moves around that it always covers the center of the pot.
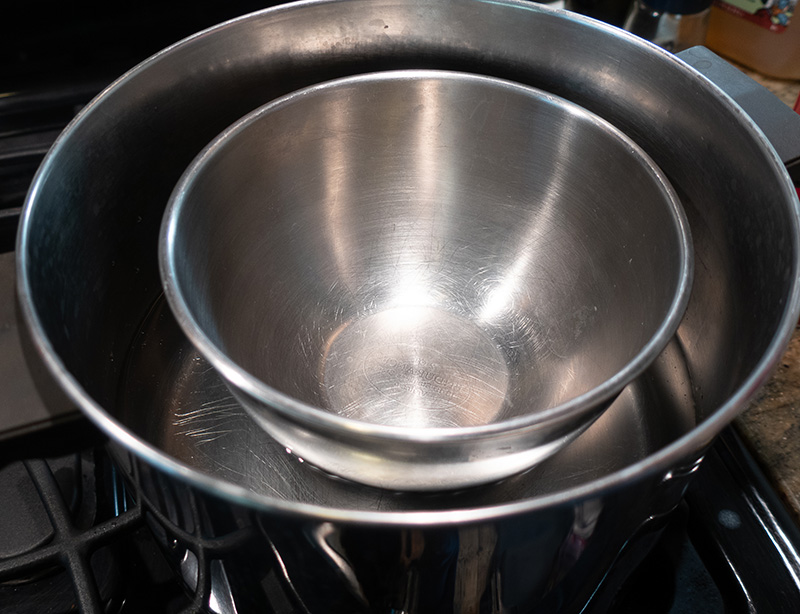
Turn the lid over so that the handle is above the smaller vessel. The handle will help channel the condensed water into the center, and therefore, into the vessel. Add ice to the upturned pot lid. Turn on the heat and let the water simmer.
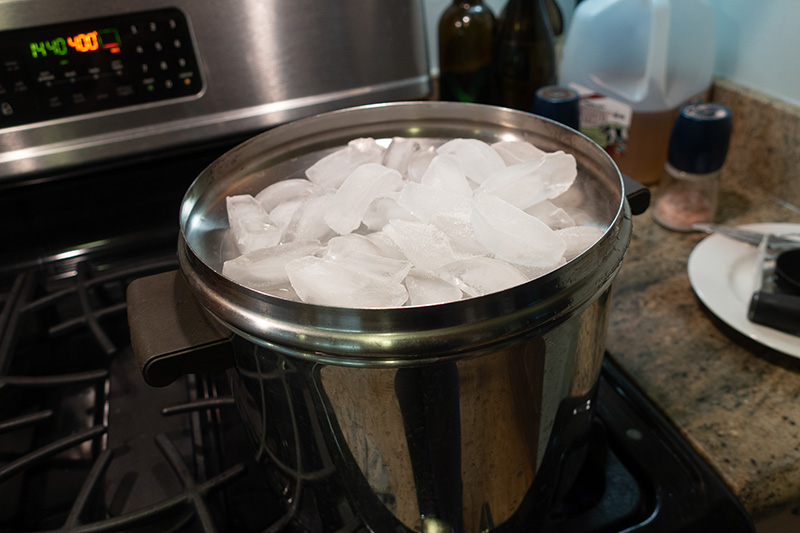
You will end up with melted ice, which you should remove carefully, as it may be boiling hot. You should get a good amount of water in about an hour. New ice will melt very quickly, so this method is more for a quick surge of distillation. You can keep the heat going, as the vapor will still condense and drop into the vessel, but beware boiling away the distilled water, too!
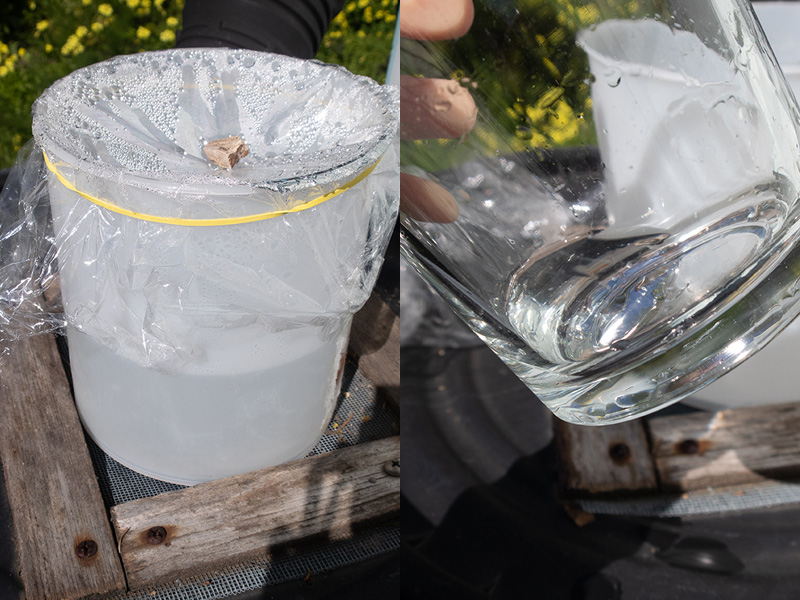
DIY Passive Solar Distiller
You’ll need:
- a large, clear container, preferably glass
- a smaller container that fits completely inside the larger container. A heavy container is best, so it will not need to float on the water.
- a clear lid with a handle or knob, or plastic wrap
- a small rock or weight, if using plastic wrap
You will set up the smaller container inside the larger container much like the stovetop distiller. Add water to the large containr. If your smaller container will not stay put once you’ve added water to the larger container, you can put something under the small container to prop it up and keep it still in the center.
Wrap the plastic, if you are using it, tightly around the top, and place the small weight in the center to direct the vapor down into the smaller container. If you have a lid that has a knob or handle, turn it upside-down so it serves the same purpose as the weight, directing the water to center.
Place the distiller in full sun for the day. After a few hours, you should see some water droplets on the top. This method is slower than the stovetop method, but by being passive, it saves your time, and uses the free, renewable resource of sunlight!
I store my distilled water in a mason jar and refill as I collect more filtered water, and I only use it to water my sundews. Luckily, they are small. If I had many bog plants that needed distilled water, I would probably need to up my distilling game to something larger-scale, like some of these reverse osmosis filtration systems (warning: they are not cheap).
Happy growing!