

This is a looooong guide, but I wanted to be thorough and explain why some things are the way they are.
Edit 9/17/2020: If you want a simple, one-page guide to Growing Tomatoes, check out my new Tomato Growing Guide Printable!
First: Where you Garden Matters
Depending on your micro-climate, tomatoes might be super easy or incredibly hard to grow.
Why? Tomatoes love hot, sunny days.
In areas of the city with less fog, like the Mission, the East Bay, and areas below the fog belt they grow like weeds (This is not an exaggeration: in tiny Brisbane where I live, adjacent to San Francisco, the mountain protects us from most daytime fog and tomatoes do so well here that the “volunteers” are actually more like weeds!).
In the Sunset or even Glen Park, chilly summers mean less, and lousier, tomatoes.
How to cope with a foggy garden? Try some of the strategies below and see what works for you–you’ll find the sweet spot for your microclimate if you have the patience. What is gardening about if not patience, right?
Starting seeds
You can purchase tomato plants at many nurseries, and you can even find decent varieties, too, but I don’t recommend it. You’ll pay between $4 and $10 for a tomato plant, but for less than $3, you can start your own tomato forest from seedlings.
And, starting from seed yourself has even more benefits than price:
- More variety. You have the whole seed catalog to choose from, instead of the few varieties the nursery may carry.
- No imported pests or diseases. When you buy plants, they could already have contracted a wilt, fungus, or be harboring aphids.
Tomatoes are hardy plants, so even if starting seeds is new to you, you should succeed. There is a lot of advice out there about starting seeds, and it can feel like there’s a lot of rules. I can tell you from experience that you don’t have to be perfect in every way to get good results.
The essentials for starting seeds:
- Soil or seed starting mix **
- Container with drainage holes for soil
- Seeds
- Light
- Water
Yes, you can start tomatoes in a climate-controlled greenhouse, on a rack under grow lights and on top of a heat mat, or in yogurt cups in the windowsill. I’ve found that the amount of effort is not equal to the result. If you don’t want to spend a lot, do the windowsill. If, like me, you’re too deep into your garden addiction to ever escape, a rack with lights is nice for tomatoes and some other plants.
Something to remember when you read most gardening advice: it comes from professional farming. When to fertilize, Ph levels, bleaching your containers before using them again–these are things professional growers have to do to maximize yield and profit. Is it good advice? Absolutely! Is it essential to getting yourself some happy plants and a caprese salad or two? NO.
To give your tomato plants the best head start in the garden, you should start them indoors 6 to eight weeks before you plan to get them outside. I usually try to plants out in April or May, so starting seeds in March works great.
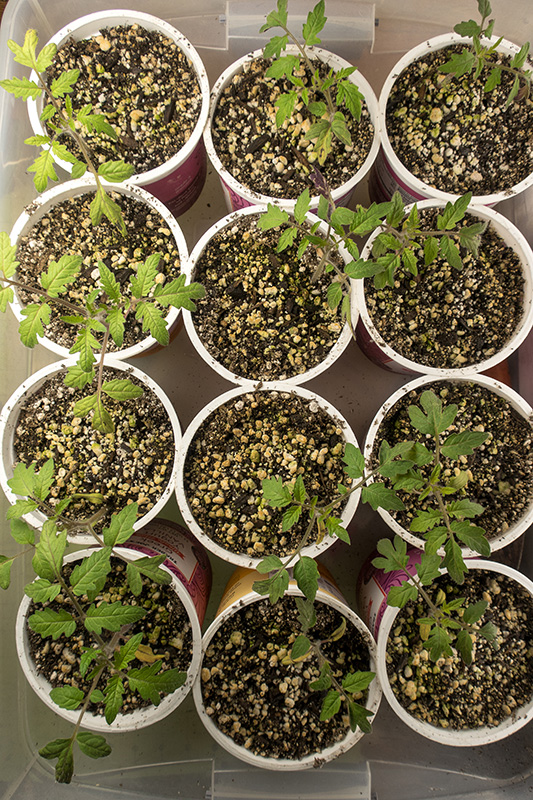
Steps
- Make sure your containers have drainage holes (yogurt containers stabbed with scissors work fine) and are labeled with the variety of tomato you’re growing (if you have more than one).
- Take your containers, fill them with your soil or seed starting mix, and wet with water.
- Take 2 or 3 seeds per container and plant them in the middle of your container to the depth the seed packet recommends (usually 1/4″ deep).
- Place containers somewhere warm.
- In a few days, you will start to see little U-shapes pop up, and then they will get all the way out and you’ll see the smooth seed leaves of your plants.
- Place container on a sunny windowsill or under grow lights and keep moist.
- If you have more than one sprout per container, take scissors or carefully remove fully the weaker plants, trying not to disturb the one you plan to keep. This is not easy to do, killing your baby plants, but if you do not, all your plants will suffer and compete with one another. Cull the weak! Do it!
** The best option for starting seeds is something called “soiless potting mix.” This can be purchased already mixed for you, or you can make your own by mixing half perlite or vermiculite with half peat moss or coconut coir. They sell all these things at gardening stores. You can also just use dirt from your garden–the danger is that you may bring in bugs, soil disease, and weed seeds, which are all things that kill seedlings easily. It’s up to you.
Potting Up
Tomatoes are one of the few plants that LOVES to be repotted. When your seedlings are starting to look leggy (i.e. long in the stem), and you have a few sets of true leaves (i.e. not seed leaves; not the first pair of leaves), you should look to pot up. Think of it like an upgrade to a bigger house for your plant’s roots. The new container should be big enough to house the plant as it is now, as well room for most of the stem AND room to grow. Also, the new container will use real soil, ideally with compost, because the nutrients from the seeds have been depleted and those roots are hungry!
Grab your bigger pot, put some soil with compost in it (but don’t fill it too much), and carefully coax your baby tomato plant out of it’s current container. Then, gently pry the roots apart a bit to encourage growing away from each other, and place in the new container. Your plant’s stem should be inside the pot, not at the top, because you are going to want to bury as much of the stem* as you can, up to the first set of true leaves.
Now, treat your potted-up plant just like you did before, with light and water, until you are ready to transplant it outside.
*Tomatoes are weird. Along with their nightshade cousins, like potatoes, can grow roots out of their stem. Burying the stem of your plant gives it a deeper root system, and that makes for a more sturdy plant when you finally plant it outside. It’s especially great if you get a lot of wind. Bonus tip: burying potato plants’ stems means more roots, and potato roots = potatoes!
Planting
You can plant tomatoes outside in most of the Bay Area from April through June. If you are in the foggier areas, aim for April to be sure your plant will have time to mature if the summer is on the cool side (which means starting seeds in February), or, aim for the fall, which tends to have less fog, and just plant shorter-season tomatoes in June (starting seeds in April).
Tomatoes grown indoors should have a few sets of true leaves before you put them outside, and, ideally, you will have potted them up a few times before they get to the garden.
But, before you start shoveling holes in the garden for your tomatoes, you have to do the WORST THING IN GARDENING: Hardening Off.
Hardening Off
It’s tedious, it’s boring, I hate it, but if you don’t do it, you will probably kill your plants.
About two weeks before you will actually transplant your tomato plants outside, you need to start hardening off your plants. That means gradually getting your plants used to being outside. Your baby plants are like children raised in a bubble–they’ve never been exposed to the harsh world out there. Wind, direct sunlight, unreliable moisture levels, and temperature fluctuations are totally new. Be gentle.
Tentative schedule for hardening off tomatoes:
- Day 1: 2 Hours in Shade
- Day 2: 4 Hours in Shade
- Day 3: 1 Hour in Sun, 3 in Shade
- Day 4: 2 Hours in Sun, 4 in Shade
- Day 5: 4 Hours in Sun, 6 in Shade
- Day 6: 6 Hours in Sun
- Day 7: 8 Hours in Sun
- Day 8: 12 Hours in Sun
- Day 9: All Day in Sun
- Day 10: All Day in Sun, stay outside overnight
This all depends on how your plants look. If Day 4 makes them look sickly and weak, do all shade the next day: they need to adjust more slowly.
When hardening off, remember:
- Water your plants before they are going to be in the sun, especially in the beginning.
- Set a timer for yourself so you don’t forget to bring your plants in, or you will roast your babies. I have done this. It is so sad.
- Use the movement of the sun to do your work for you, like on Day 3, placing your plant in the sun in a spot that will be shade in an hour.
Fertilizing
Good soil with compost is the best fertilizer for your tomatoes, but a good balanced vegetable fertilizer can get you a happier and healthier plant. Make sure it says “vegetable” or even “tomato” on it, since some fertilizer contain too much Nitrogen and will give you lush leaves at the expense of flowers and fruits.
Depending on your soil, even if you don’t fertilize, you may do OK, but a plant that lacks nutrients will be more likely to succumb to fungi, disease, and pests. Also, tomatoes lacking calcium, specifically, will display Blossom End Rot, a gross condition that, you know, rots the blossom end.
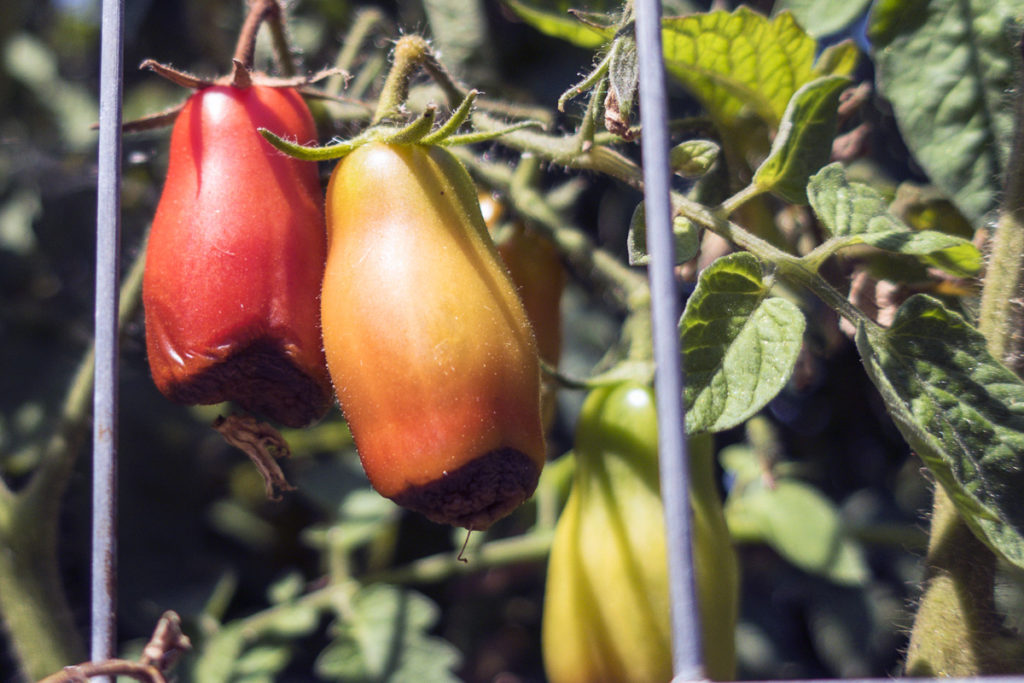
I have noticed that some varieties get blossom end rot more than others. I grow San Marzano’s almost every year, and even with regular fertilizing, the first few fruits of even season display it. Then, the rest are fine. My little cherry tomatoes, and even monsters like Gold Medal, never show it, growing in the same general area under the same conditions.
Staking/Support
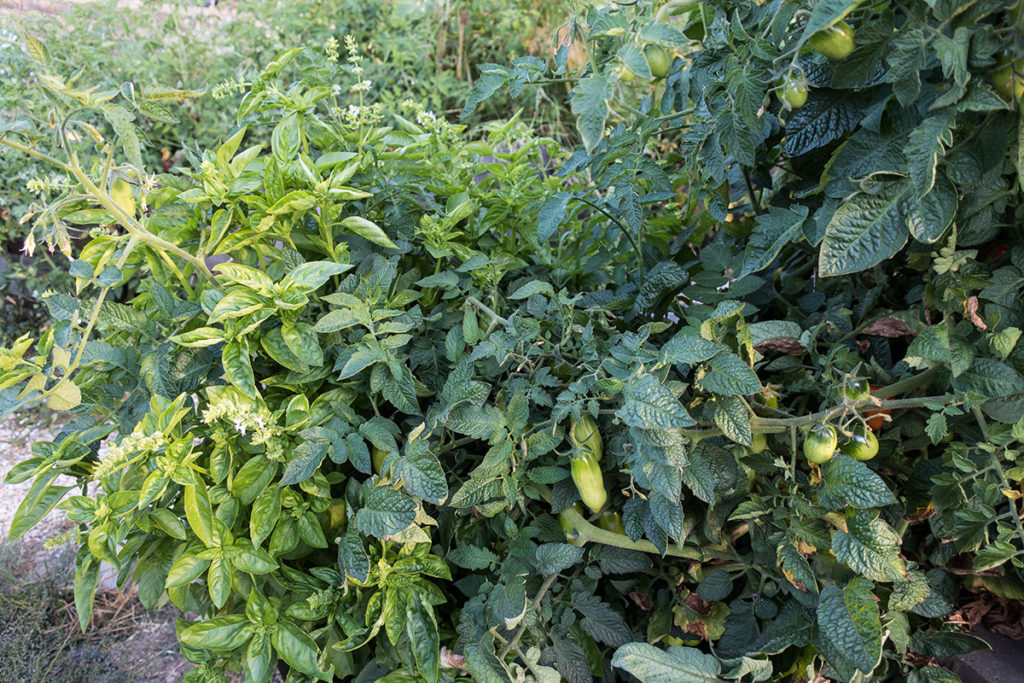
Do not buy “tomato cages” for tomatoes. They are a total joke. Look at my indeterminate tomatoes from this year: If I had used those cute little cages, this would be an even more unruly scene. Indeterminate tomatoes, which is 99% of what I choose to grow, can get to six or seven feet high if trellised, not the adorable 3 feet of most cages.
I have built my own (totally) tubular cages from hardware cloth that I cut to 4 ft lengths and then connected with zip ties. The holes are a bit tight when reaching for my tomatoes, and tomatoes do get trapped in the there sometimes, so if I were to make more cages I would probably find hardware cloth with opening of at least 4 inches square, and make them 5 ft around instead of 4 ft.
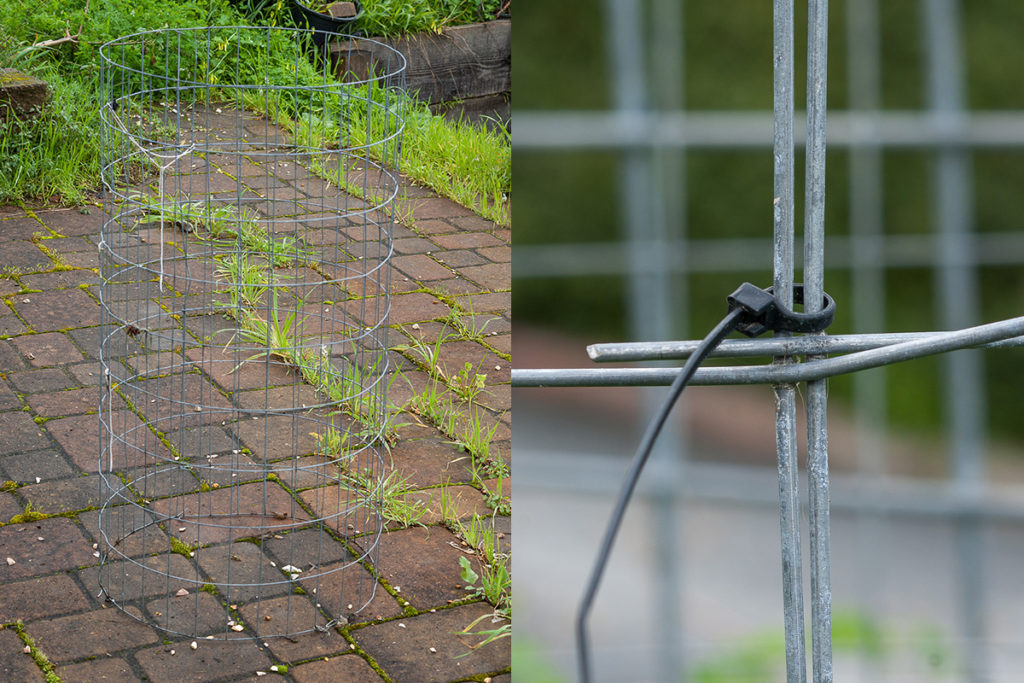
When errant branches poke out, I grab my trusty baking twine and tie them up so that tomatoes never touch the ground.
My Favorite Varieties (seeds)
Roma/Sauce
San Marzano
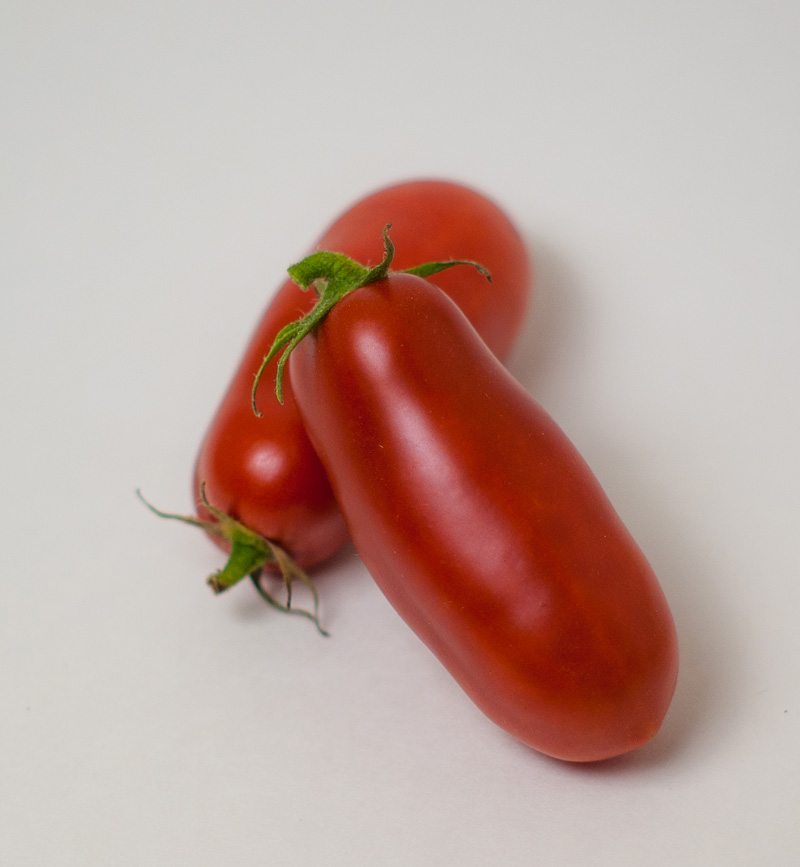
This is the essential sauce tomato, and it grows well here. Shaped like a bullet, these ripen into a deep red and come off the vine easily when ready to harvest. Aside from the early-season blossom-end rot, they resist aphids fairly well and don’t succumb to wet weather rotting like some varieties. Inside, they have few seeds and not a lot of liquid, so they make for kid-friendly, tasty sauces without having to strain seeds.
Available from Botanical Interests.
Cuore di Bue
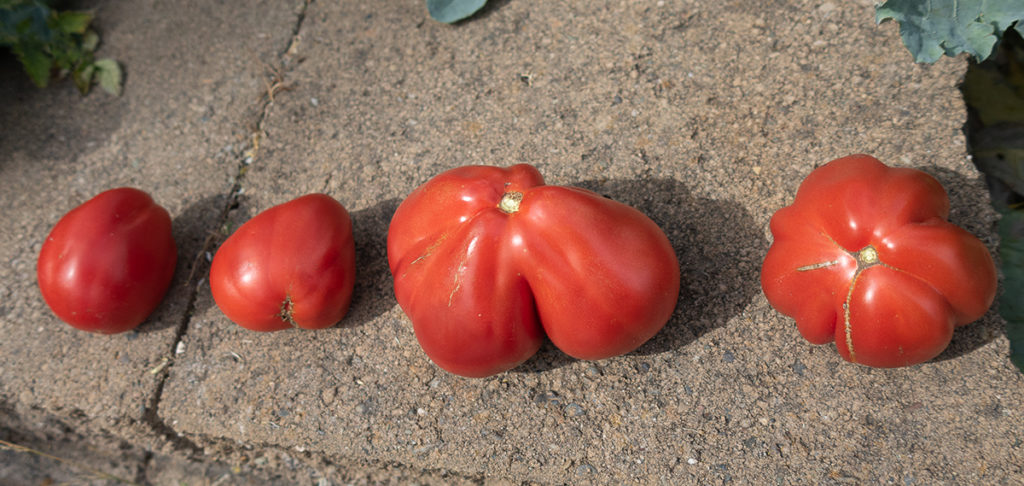
I have a full review of these beautiful Italian beasts. In summary, they are big, perfect for sauce, and don’t get Blossom End Rot.
Available from Territorial Seed Company.
Slicing
Gold Medal
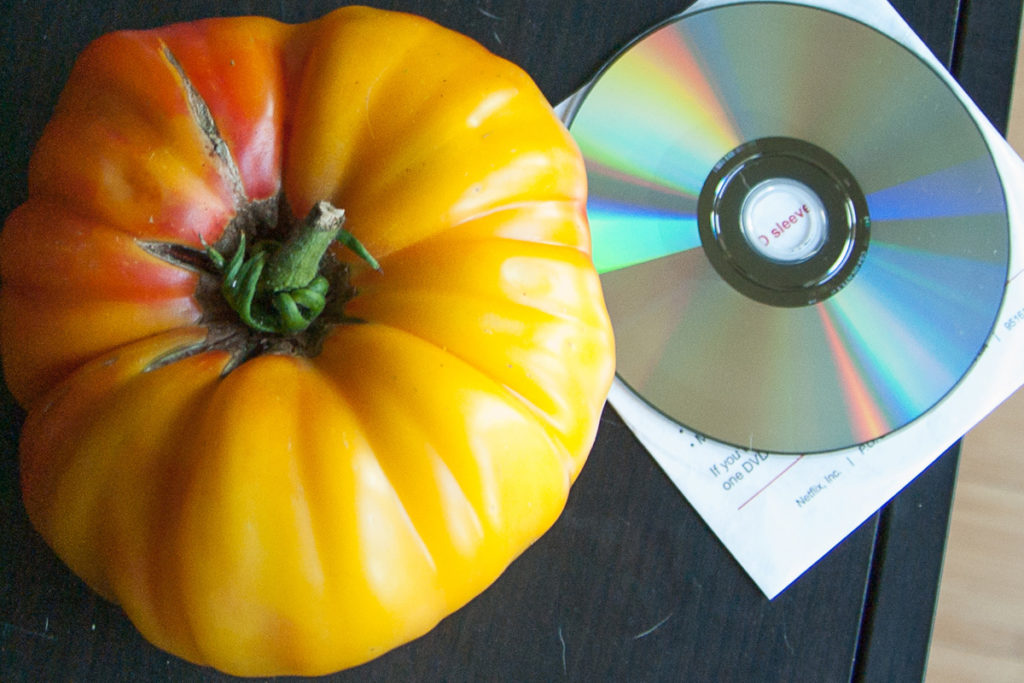
What an apt name for this amazing tomato. It’s gorgeous, easy-to-grow, and delicious. Each fruit is a sunset of color: yellows, red, and oranges merging together, outside and in, and reflecting the bright, citrusy flavor that makes for a fantastic caprese salad. Not to mention, the fruit can get to be about 2 lbs each, so you won’t feel inclined to keep them all for yourself.
Available from Territorial Seed Company.
Cherry/Grape
Sun Gold
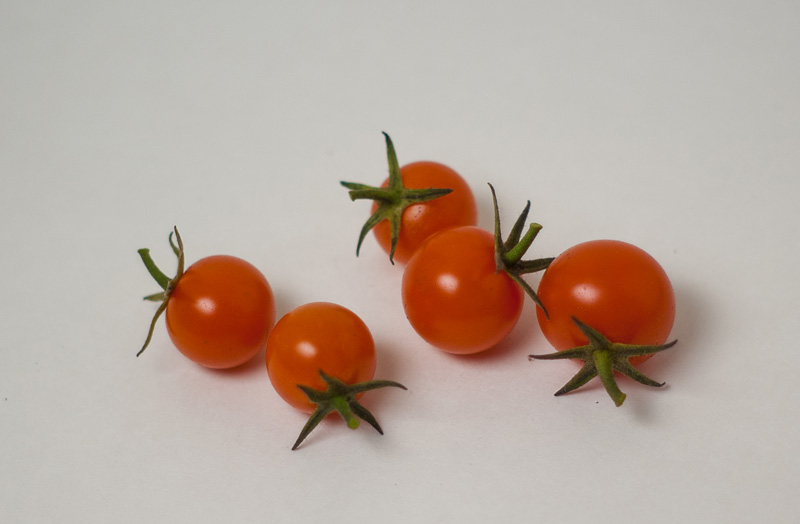
So prolific, and so adorable, these marble-sized orange balls are a fun addition to a salad.
Available from Amazon.
Chadwick Cherry
These tomatoes are amazing, both for their quick growth and speedy fruiting, but also for the volunteers! I grew them from seed about 4 years ago, and new plants pop up every year. They are the tastiest of weeds! And, their 1.5 in diameter fruits are big enough to use in sauces, and are not too sweet, so while I wait for my San Marzanos to ripen, I can already be enjoying fresh tomato sauces and soups!
Available from Amazon.
Tips for growing in foggier areas
Big, fat tomatoes need more sun, and more time, to become awesome. If it’s a foggy summer, you may not have those things, so smaller varieties are better.
When I lived in Glen Park, I tried growing some of the “cold weather” varieties like Siberian, and found them lacking in taste and texture, so I would recommend you avoid most of those. I did find Cosmonaut Volkov very nice, but not super prolific–however, I am not in a foggy area now. Choose your varieties for short growing season, and also consider starting earlier or later–the summer is foggier than the fall in the San Francisco Bay Area, and we don’t get a frost (usually). I’ve picked tomatoes as late as February during a dry winter, so fall tomatoes are totally doable.