
Choosing a Variety
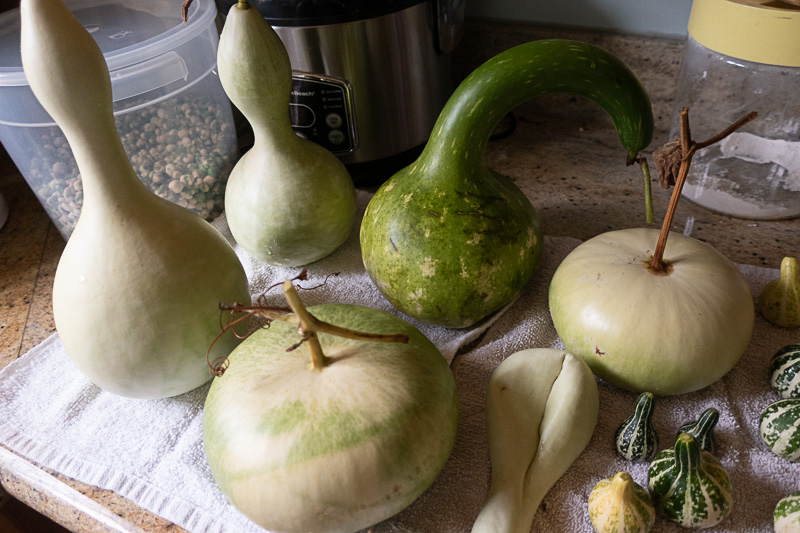
Gourds are one of those plants that combines two of my favorite things: gardening and crafting. In the New World, gourds were used to make bowls, basins, spoons, cups, toys, and even chicken egg decoys! These days, gourd carving, painting, and crafting are a whole arm of the folk art world. As such, there are many shapes and sizes that have been honed through careful seed saving and breeding through the centuries.
Some Varieties Available Online:
Birdhouse/Bottle: Botanical Interests Link
Luffa: Botanical Interests Link
Spinning: Botanical Interests Link
Corsican: Botanical Interests Link
Dipper: Sustainable Seeds Link
Snake: Seeds Now Link
Bushel Basket: Rare Seeds Link
Big Apple: Rare Seeds Link
Ozark Nest Egg: Rare Seeds Link
An internet search will give you even more!
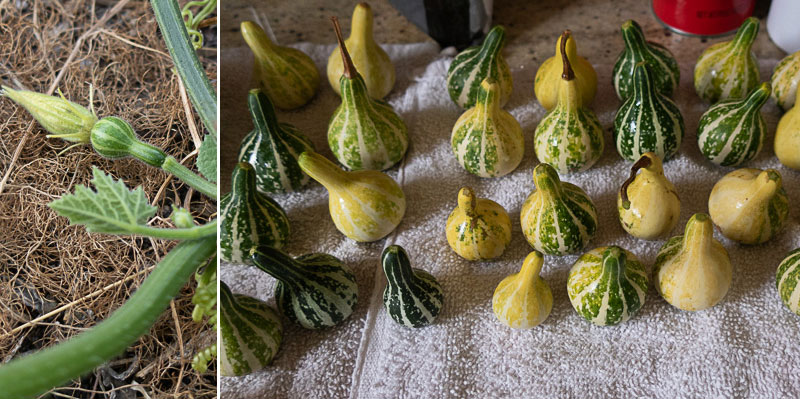
If you aren’t sure which ones to grow, I suggest starting small to guarantee success. The small ones grow more prolifically on the vine, will take less time to mature, and take less time to dry and cure. You can also grow a variety so that you’re more likely to get some successes, even if some varieties fail.
*Warning! If you grow gourds in your garden and hope to save seeds, beware that gourds will cross-pollinate with other gourds, squash, pumpkins, and even cucumbers! Unless you can assure no cross-pollination, I recommend using packaged seeds.
Planting
Gourds like heat, and consistent heat at that. In most areas around the Bay Area, we have those cool, foggy nights, so we just can’t give gourds their best life, but we can give them a rough facsimile.
No matter what your seed packets may say, start your gourd plants indoors. Some gourds take a long time to germinate, and since they want a consistent, warm soil temperature, they may wait until October to sprout. Starting them indoors means a nice warm place to sprout, and grow a bit, before dealing with the harsh realities of life outside.
Use a soil-less potting mix, and a container that is bigger than what you might use for a lot of other plants. I like a quart-sized yogurt container for gourd sprouts.
Gourd seeds really like to take their time sprouting, so do not lose heart. I once to completely gave up on some gourd seeds, and stopped watering them entirely, only to find them suddenly sprouting and ended up with a very healthy plant. Plan on waiting a month for some. Just wait for it!
Transplanting
Gourds are not super excited about being transplanted, so be sure to take extra care when planting them out in your yard.
Start by hardening them off. This means allowing them to gradually get used to sunlight, wind, and the variations in temperature that exist outside and do not exist inside your home or greenhouse. Give your plants at least 10 days to slowly get used to being outside (Hardening Off Guide).
When your plants have transitioned to being fully outside, they can be safely transplanted. Choose a spot in full sun, and with the best soil you can give them, to transplant your seedlings. Just like most plants, make a hole twice as big as a container your seedlings are in now, and gently coaxed the plant out of its container without disrupting the roots.
Carefully place the roots and plant into the hole you dug, and fill back in with the soil, leaving the plant at the same level of soil as it was in the container.
Gourd seedlings are very susceptible to snail and slug damage, so I recommend putting a slug force field in place when you transplant to ensure you don’t come out to find a chewed-up nub instead of your seedling the following morning.
Growing
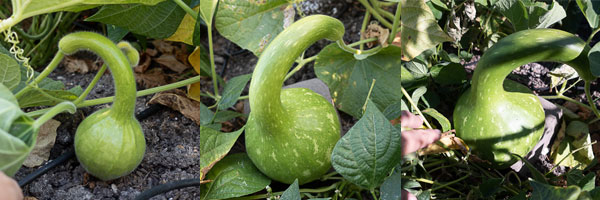
When you transplant your gourd seedlings outside in April through June, consider whether you are planning to have them trail across the ground or climb a trellis or fence. Your gourd plant will be happy either way, but since you are growing hard shell gourds, appearance is important. Growing gourds on the ground means that they will have a spot where they lay, that will become flat as they grow, just like pumpkins. Growing on a trellis will mean that the gourd can hang freely and be more perfect in shape.

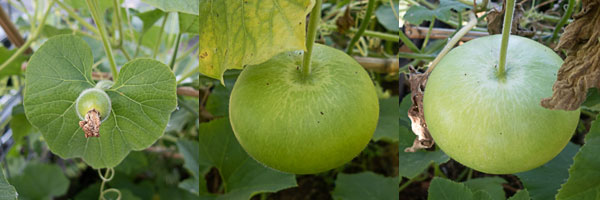
You can assist with pollination of your gourds much like with any other squash, gourd, or cucumber. You take the male flower, remove the petals, and use it as a brush to pollinate the female flowers.
And don’t worry, gourds that hang from a trellis naturally grow stronger and thicker stocks to support their weight. The only real danger with trellising gourds is extreme wind, which I happen to have to deal with, so I use slings to protect my vines and gourds. If in doubt, support your gourds, since a gourd falling may take part of the vine along with it.

If you are lucky enough to have a lot of gourd fruit on your vines, consider plucking off a few that are smaller and less robust. The more energy your gourd Vine can put into your gourds, the healthier they will be. The same technique is used with pumpkins, to grow the very largest ones possible.
Also, you can remove fruit that appears too late in the season to grow to maturity, as it will use nutrients from the plant, but never produce a fully-formed gourd. If you try to dry a gourd that is not fully mature, it just will not work, and, when it rots, it may spread that rot to your mature gourds.
Harvesting
Gourds are ready when they are full-sized based on what the seed packet tells you, and usually when the vines are drying up and dying back. Some large-scale gourd growers will tell you that you can leave your gourds in the garden to cure over the winter. I have not tried this, and since our Winters here are so wet, I do fear a whole bunch of mushy gourds in my garden come spring. I recommend harvesting your gourds in the fall, and, preferably before the worst of the rains.
Use sharp shears or clippers to cut the gourds free, leaving at least 2 inches of stem on the gourds. Some small gourds, like spinning gourds, have very fragile stems that just fall off. Luckily, those small gourds will dry out and cure faster, and the need for a stem to aid in drying is less critical.
As soon as you harvest, wash your gourds with soap and water, and then wipe them down with alcohol or diluted bleach and air dry indoors before moving to the next step.
Drying/Curing
Where
You will wants to dry your gourds in a place that is not damp, and where people do not frequent, as there can be quite a smell. I use an unenclosed front porch that does not get rain.
How

Put your gourds in some very dry newspaper, or something equally absorbent, to ensure they do not sit in their own moisture. If you can secure the gourd with twine, you can hang them, but not all shapes of gourd will allow this. A rack or other open-bottomed support can also work.
The moisture inside your gourd is going to naturally dissipate through the skin and stem of the cord, so you should turn your gourds over every week or so as they dry if they are not hanging freely.
Mold is your Friend
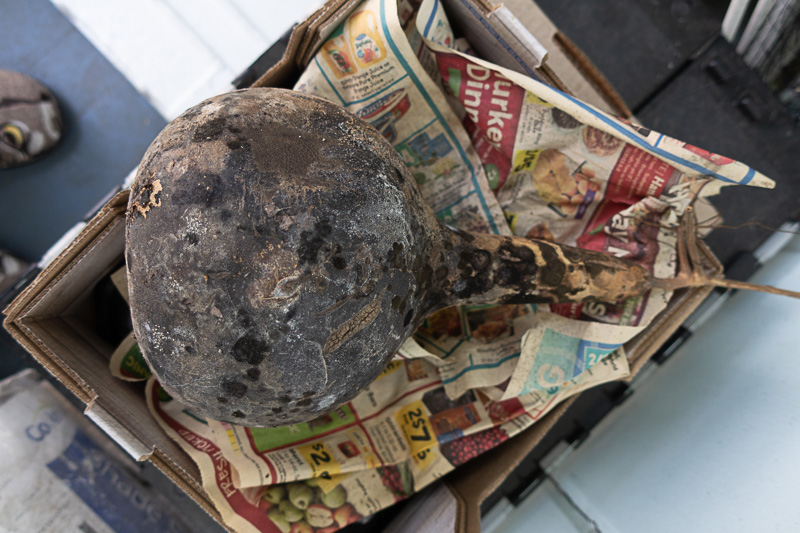
When your gourd gets moldy, do not despair! I know that the first time I found mold on the gourd I was drying, I nearly chucked it into the compost bin immediately. Luckily, I then went on the internet to look up any possible remedies, and discovered that mold is a natural and inevitable part of the drying process. In fact, the mold forms on your drying gourd will help create interesting patterns on the skin of your final creation.
Soft Spots are your Enemies
Soft spots, however, are not as welcome. When you see mold on your gourd, you can carefully touch the areas and see if any feel soft and moist. Soft spots mean that the gourd is rotting, not drying, and that means it needs to be discarded immediately. If you leave it among your other gourds, you risk the rot spreading to them as well.
The drying process is complete when the gourd feels light and you can shake the gourd and hear the seeds clack around inside. Leaving it for longer is not a problem, so be sure it feels completely dry and done to you.
Cleaning
Your gourd now looks like a rotting vegetable, so how do you make it worth using for something?
Equipment
- Gloves
- Sponges/rags
- Steel wool/sand paper
Process
Soak your gourd in warm, soapy water and then clean it as best you can, scrubbing at the mold with a sponge or rags.
If mold will not be removed easily, use steel wool (the kind designed for removing paint) to scrape it down. This comes in grades just like sandpaper, so go from roughest to finest. Steel wool will scratch the surface, so only use this if you plan to smooth out the surface later with sandpaper.
To smooth out imperfections, use sandpaper 80 grit and above to start, and then a finer grit to smooth it all out.
A cleaned gourd doesn’t always look too amazing, especially if you’ve done some serious mold-scraping.
The beauty in those mottled mold-spots really only comes out if you stain, wax, or dye your gourd. I used Eco-Flo Leather Dye (Eco-Flo Leather Dye on Amazon) and plan to turn my birdhouse gourd from the images above into a fairy house by using Sculpey Clay (Sculpey on Amazon). I will post pictures when it’s done!
Projects
While this year’s gourd harvest looks to be substantial, I’ve actually only cured and cleaned one gourd so far, and it’s a work in progress. For inspiration and instruction on turning your gourds into something cool, I recommend these great online resources: