Slugs (and Snails) eat baby plants. They love tender infant beans and cucumbers and totally ruin all that hard work you did weeding and composting and planting. So many plants are just easier to direct-sow into the ground or pot, and starting beans inside seems so asinine given how well they do in the ground. It’s just those darn slugs, screwing it up for everyone.
There are products like Sluggo and beer traps, and other things that may help keep the slimy buggers under control by killing them. I even tried using cabbage collars, which have copper embedded in them, but they are flimsy and on first big windy afternoon, I found them on every plant BUT the ones I had placed them on. They also only work on sprouted, established plants.
But no worries: I have found the best way to protect baby plants from slugs and snails. It’s cheap and easy to implement, and doesn’t involves killing slugs or snails:
I make slug force fields–devices that go around my seeds and baby plants–that slugs just don’t want to touch.
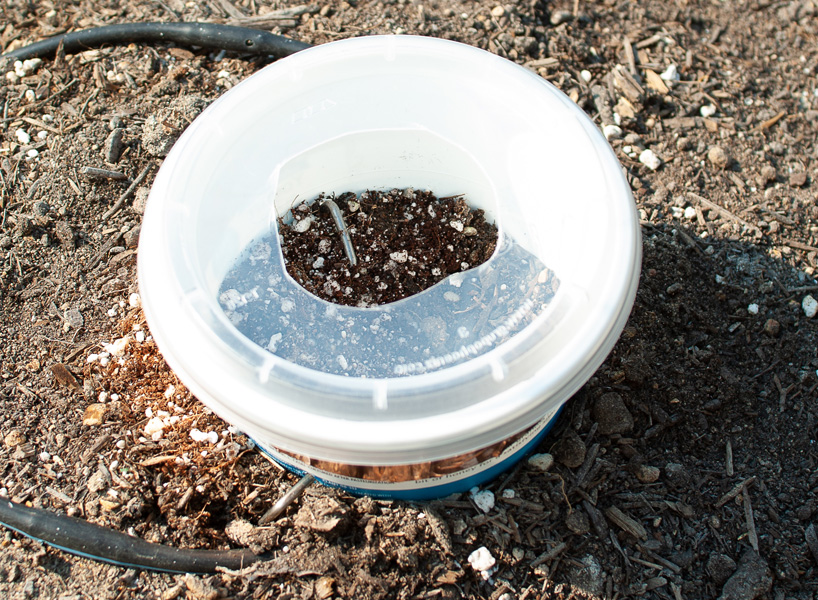
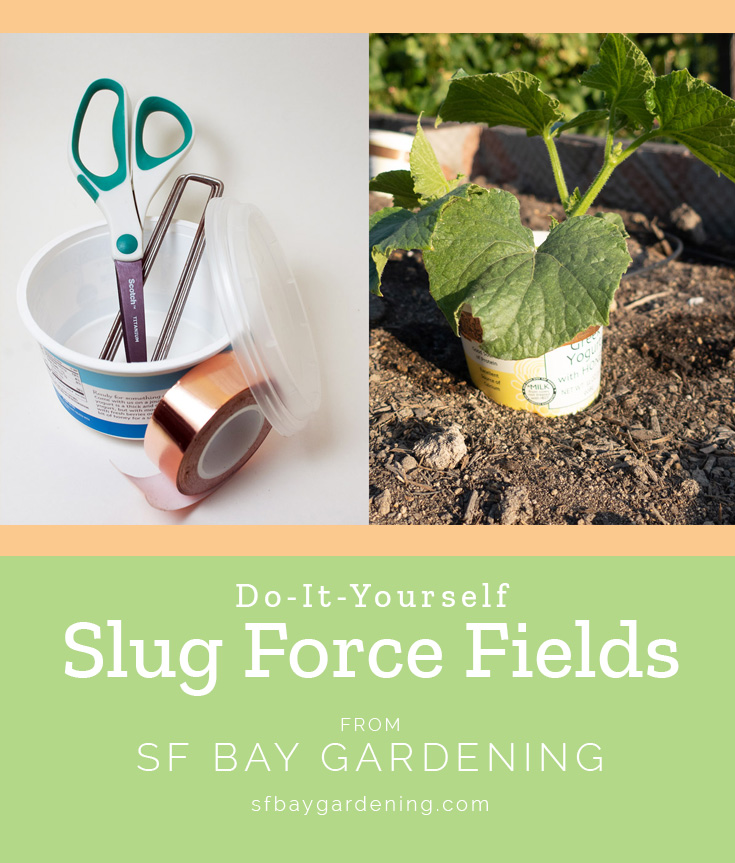
A completed force field in the ground, ready to protect some seedlings!
DIY Slug Force Field
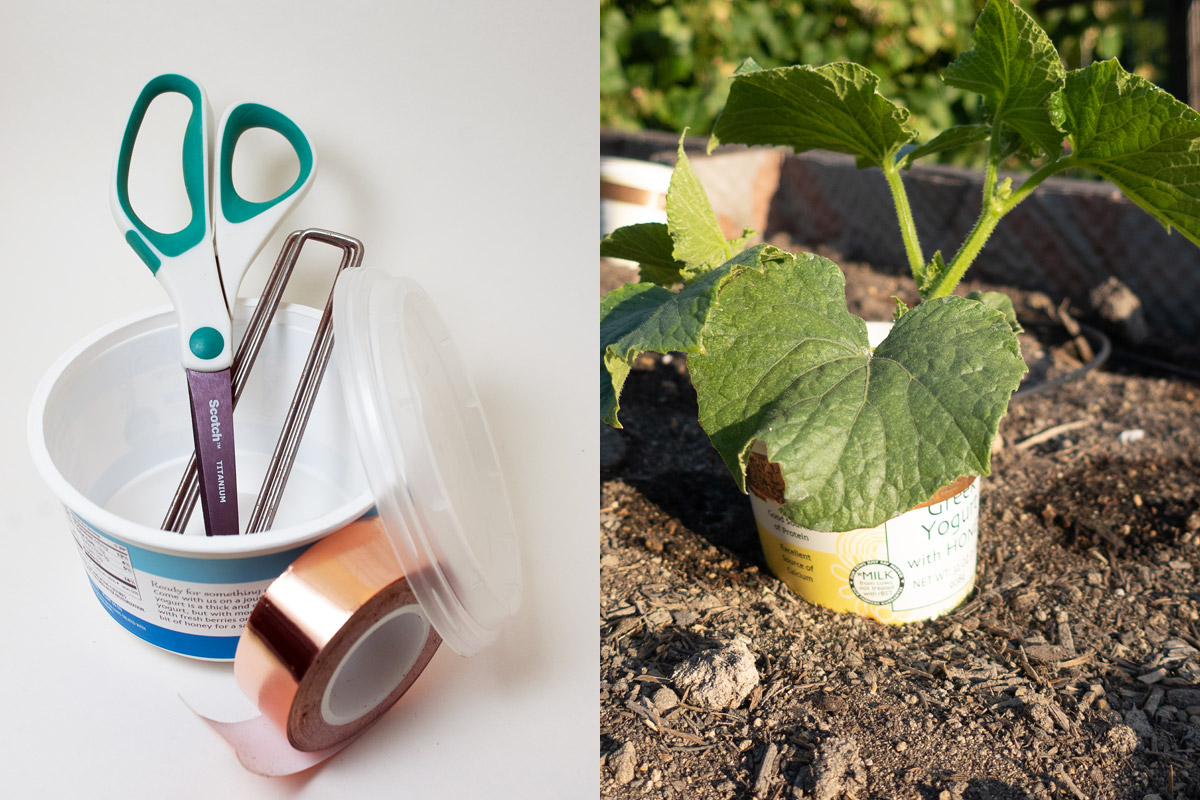
You’ll need:
scissors
a plastic yogurt container or similar container
2 or 3 ground staples or something else that will anchor the force field to the ground
copper tape that’s at least an inch wide
the lid of the container, which can be used to make the force-field double as a greenhouse for your seeds & sprouts (optional)
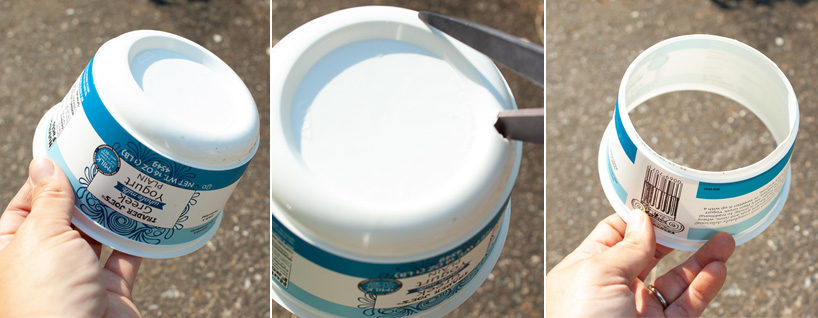
Step 1:
Cut off the bottom
Using scissors or a knife, cut away the bottom of the container.
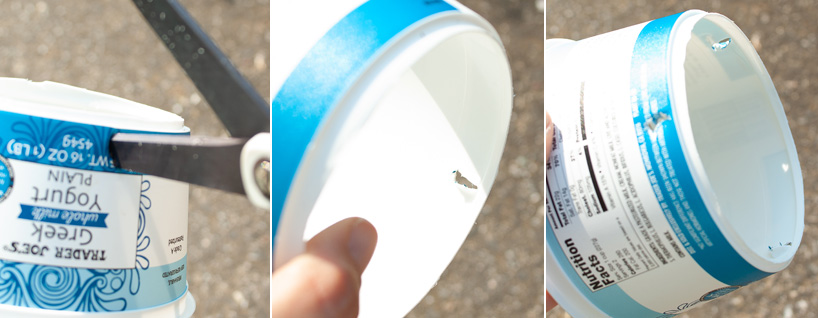
Step 2:
Poke 2 or 3 holes near the base, about a 1/2 to 1 inch from the base.
Using scissors of a knife, cut small holes that will allow ground staples to slide through. They do not need to be pretty!
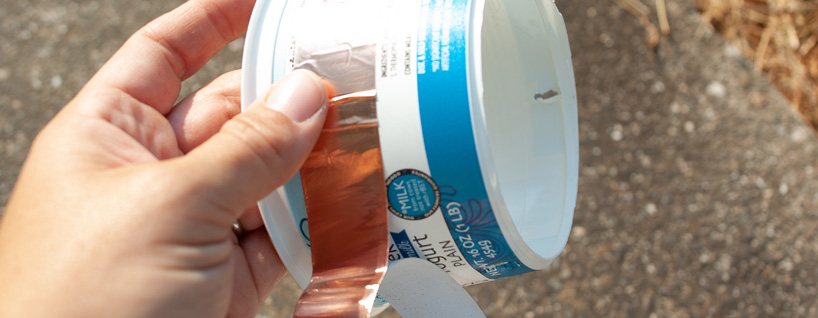
Step 3:
Wrap the container all the way around with copper tape, in the middle closer to the top. Overlap at the edges, and flatten the tape out as best you can.
Measure your tape before you cut so that you can be sure you have enough with slight overlap at the edges.
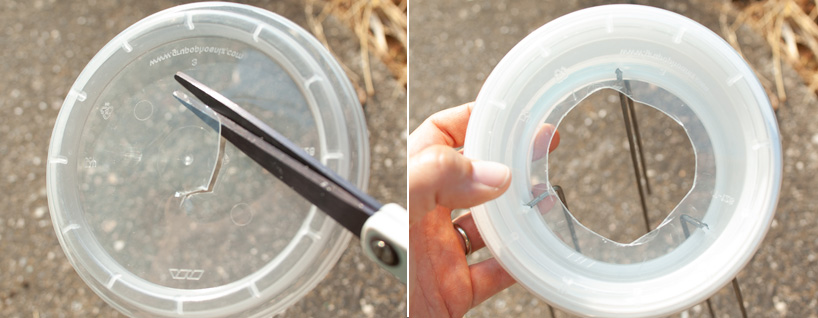
Step 4 (optional):
To benefit from a bonus greenhouse add-on, cut a hole in the center of the lid. This works with clear or opaque lids, and it depends on how hot your area gets. The sun in Brisbane can be too hot for tender sprouts in a greenhouse, so I sometimes use the clear lids, but add duct tape to darken the lid. The moisture stays inside, helping seeds sprouts, but I don’t have to worry about roasting the baby plants.
Be careful not to crack the lid, just cut. The hole is crucial to keep the plants from burning by venting hot air.
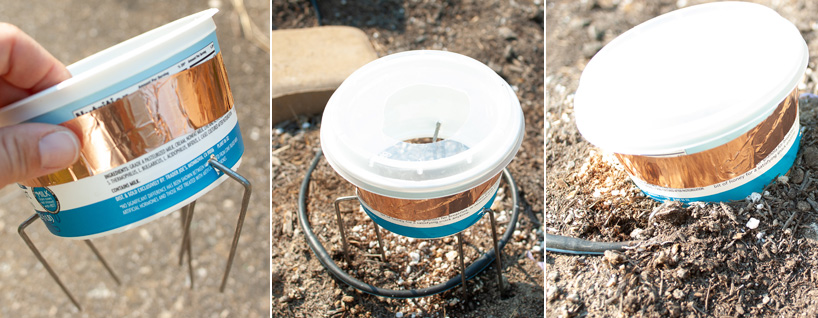
Step 5:
Insert the staples into the holes, drive the staples into the ground, and settle the force field onto the soil, ensuring the bottom edges are touching or even into the ground. You can pile soil up around the outside if you need to. No gaps allowed!
Carefully put in place in the garden, leaving no gaps between the edges of the container and the soil.
Step 6:
Plant your seeds or transplant seedlings and water. You’re done!
How does it work?
Slugs/snails are gross and wet, as you may have noticed, and their slime contains ions that, when touching copper, creates an electric shock in the slug/snail. The shock is unpleasant, so they won’t keep going when they feel it. Thinner lines of copper may allow them to cross by not providing enough contact, so I always use an inch wide or wider to repel them.
Best Plants for Slug Force Fields
I love these for plants that benefit from being sown in the ground, like pumpkins, cucumbers, squash, and even beans, but it would also work for brassicas like broccoli, cauliflower, kale, and any other plants you might otherwise find eaten down to a nub in the morning.
Maintenance
These force fields are pretty maintenance-free. The copper gets tarnished over time, but I’ve used them for more than one season with success. The plastic will eventually break down after repeated years in sunlight, but making them is cheap and easy.
While plants are young, you do need to ensure that no pathway forms for slugs after the planting until the spouts are big enough to be safe. That means a stick or leaf that makes a bridge, or something jarring the container so that a tunnel forms underneath. Containment is key!
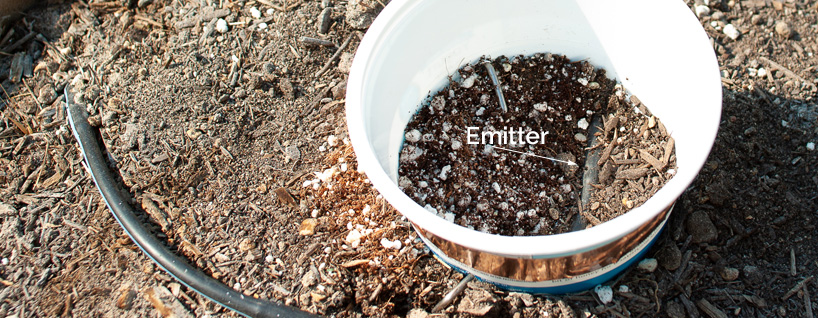
Using with drip lines
With my drip irrigation lines, I have had to carefully bury them, then bring up the emitter inside the container, and then bury on the other side. I use more ground staples for this, and it makes seed-starting very easy, because if you forget to water the seeds at that critical sprouting time, slugs aren’t your biggest problem.
Drip lines can be buried, and then emitters allowed inside the force field.
Let me know if you try out some slug force fields in your garden, and I’d love to know if you have any improvements on them!