Planning your garden can be tricky if you don’t have a simple rectangular plot. I have seen many multi-level and odd-shaped gardens in the Bay Area, and mapping out accurately what you can plant in those configurations is not easy. Even the garden software you can purchase will require you to measure your spaces, and if you have several, that’s a lot of time spent. My own garden is a multi-level area that includes non-rectangular raised beds and other kooky shapes. For years I roughly sketched out my garden plans on graph paper, and I often got my plant spacing wrong. Then, a few years ago, I realized my garden was already mapped, and I could have a perfect, free, and accurately-scaled version of my garden to plan on using Google Maps!
Step 1: Find and Screenshot Your Garden Map
Go to maps.google.com and enter your address. There might be a simple picture of your house or building next to the street, but that doesn’t help us with your actual garden.
Map View of your home & garden. Not super useful.
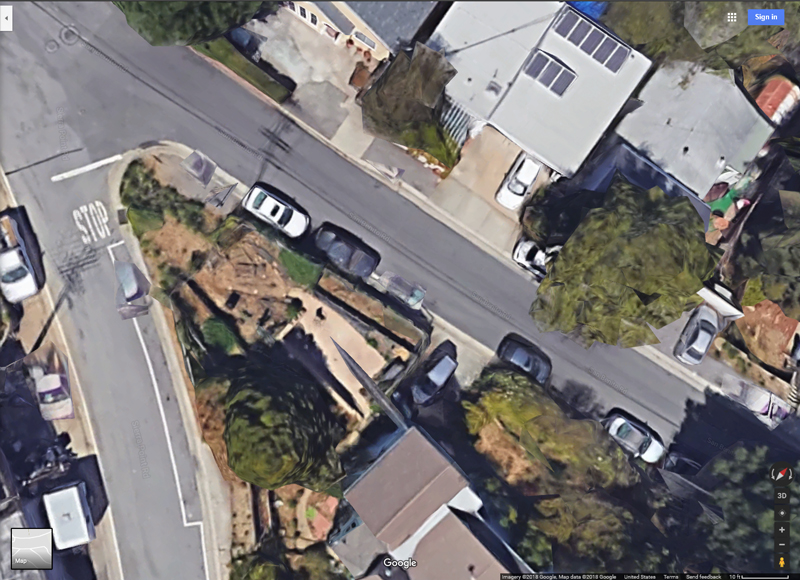
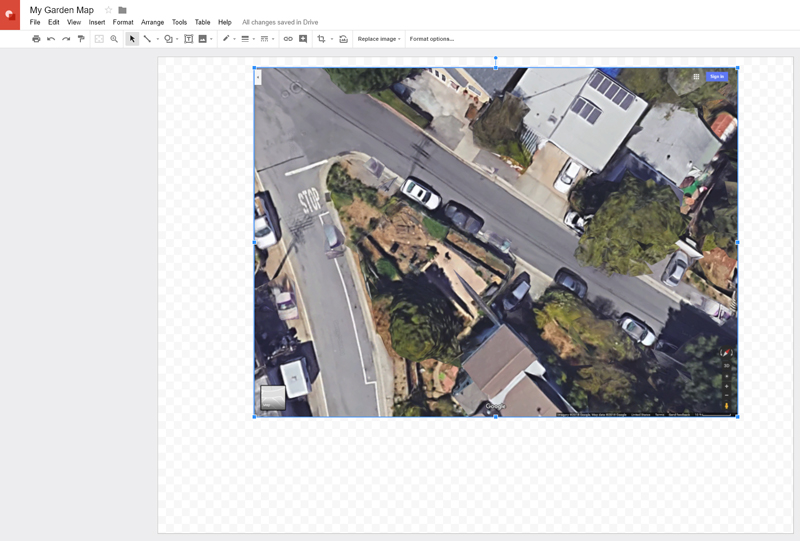
At the bottom of the screen, click the “Satellite” square button.
Now, zoom in as far as you can go without the whole scene jumping to “street view,” which is when it looks like you’re standing next to your yard. If you go too far, zoom back out by clicking the “-” button on the bottom right. You should see the 10 ft scale on the bottom right. This is important, because we need this scale to keep our map to-scale, and it means you are zoomed in as far as you can go.
Now you should see an actual photo of your yard. Looking at that photo, is your garden area clearly delineated? If yes, move on to Step 2.
If not, are there huge tree shadows or other obstructions? Was the satellite photo taken at a time of year where the whole area is just green, so it’s hard to tell where the edges of your garden plots are? Google takes many photos every year, so to get a better image for our mapping needs, we will need to do some extra steps.
Using Google Earth to Update Our Photo
You will need to install Google Earth Pro on your computer to get the Timeline feature to change your view. Strangely, adjusting this view on your computer will then update your browser view, so that you can take the aerial photo we need with the scale in the right bottom corner. When you’ve successfully found a photo that will show you your garden as best it can, move on to Step 2.
Step 2: Tweak Your Map in Google Drawings
Google Drawings is part of Google Drive. You will need a Google login to use it (If you use photo-editing software, like Photoshop, feel free to use it instead—I chose to demonstrate using Google Drawings because it is free and widely available). There are instructions on creating a Google Account here. If you are logged into Google on your browser, this link will open a new Google Drawings document for you. Give it a name!
While viewing your map on Google Maps, copy your screen:
On a Windows Computer, hold down the Alt key and press Print Screen
On a Mac, it’s Command+Control+Shift+3 to save your screen to the clipboard
Now, in Google Drawings, hold down the Ctrl key and press the V key (PC) or Command + V (Mac)
Name your Google Drawing File and paste in your map screenshot. My map here is a little different, as I already removed the browser header by using the crop tool.
You should now see your image in Google Drawings. While in Google Drawings, we need to make sure we can do two things: Trace our garden spaces AND get an accurate map scale. To make this easier, I recommend resizing the image in to fill the page, then copy-pasting another copy on top.
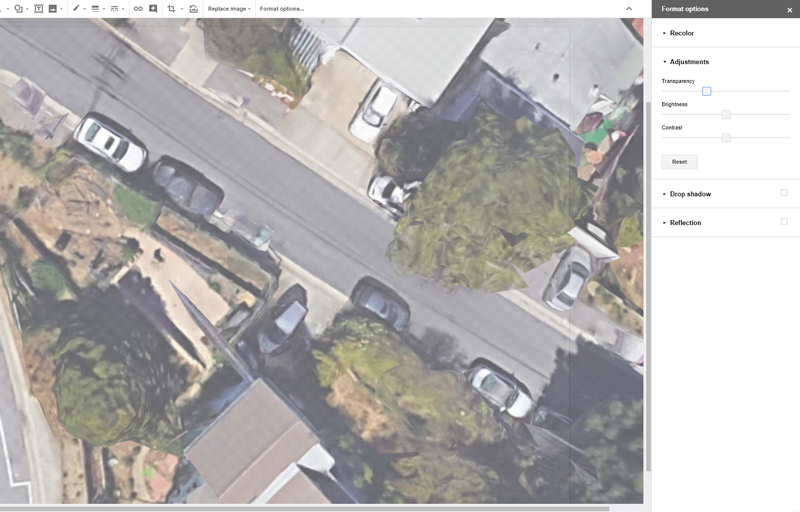
To resize your map, click on it, then, while holding down the SHIFT key, drag a corner. Holding SHIFT makes sure you don’t stretch or squash your image. Keep doing this until your garden area just about fills the page. If you have trouble telling where the page edges are, you can adjust the transparency: right-click the image, select “Format Options”, and choose “Adjustments” to get the Transparency slider.
Using the transparency slider, you can find the edges of the page. I also recommend trimming the map down to the page after you get your scale measure
Zooming Out (View->Zoom>50%) can also be very helpful when getting the map to the size you want, as well as cropping the top and left of the image (remember, you need that scale on the bottom right to remain!).
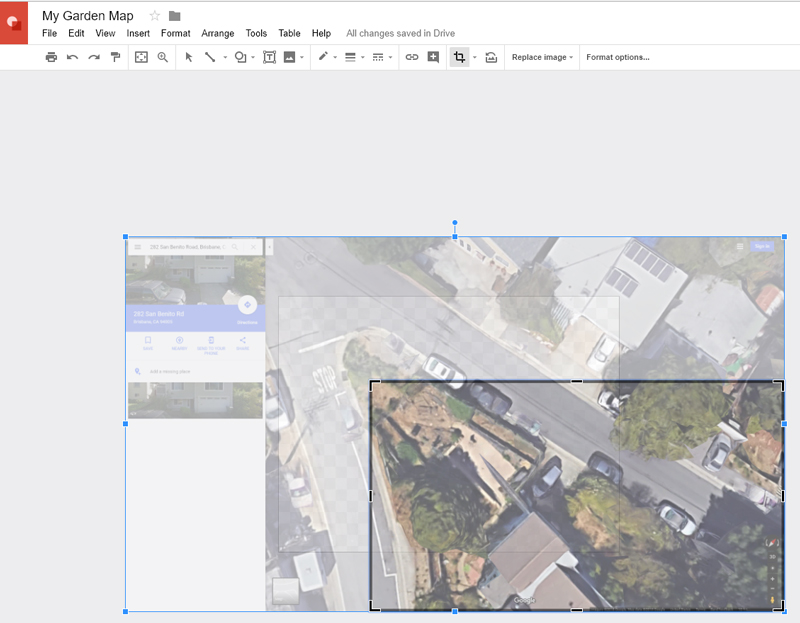
The CROP icon is highlighted in the toolbar. Be sure to only trim the top and left! When you crop, you select the portion of the picture you wish to keep.
Copy and paste another of your maps on top of the first. This top copy will be for our scale, and the bottom for the garden map. Using the crop tool, crop the top image down to only show the 10 ft scale. You may have to drag the image up a bit to get it into the viewable area. Once you have this small scale cropped, drag it out of the way.
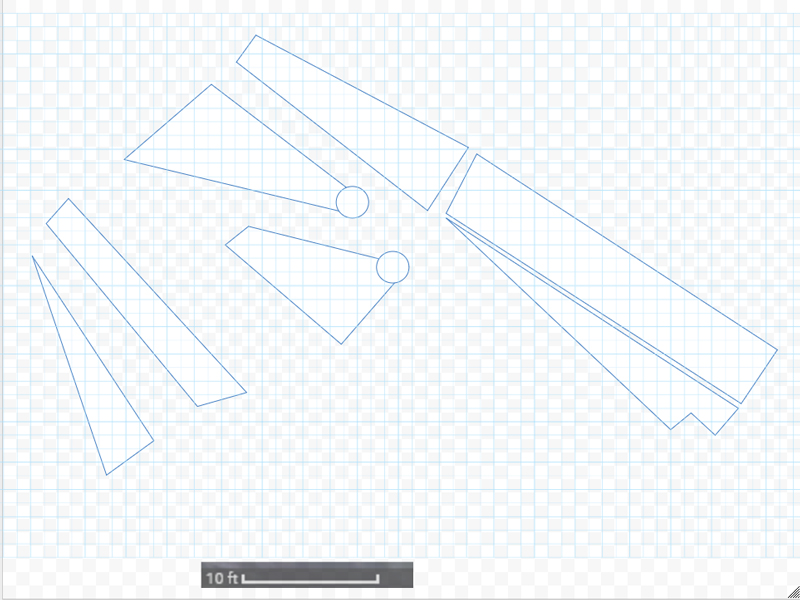
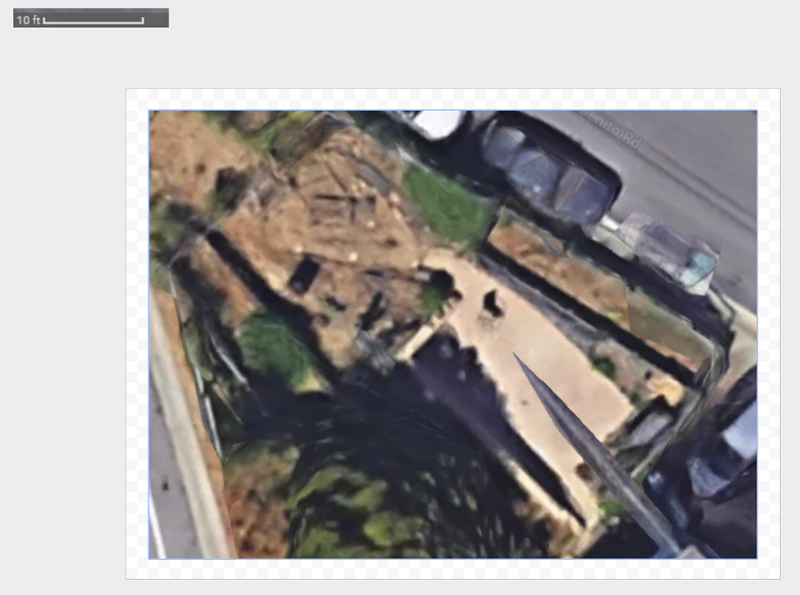
My garden, fully filling the page and the scale safely at the top left.
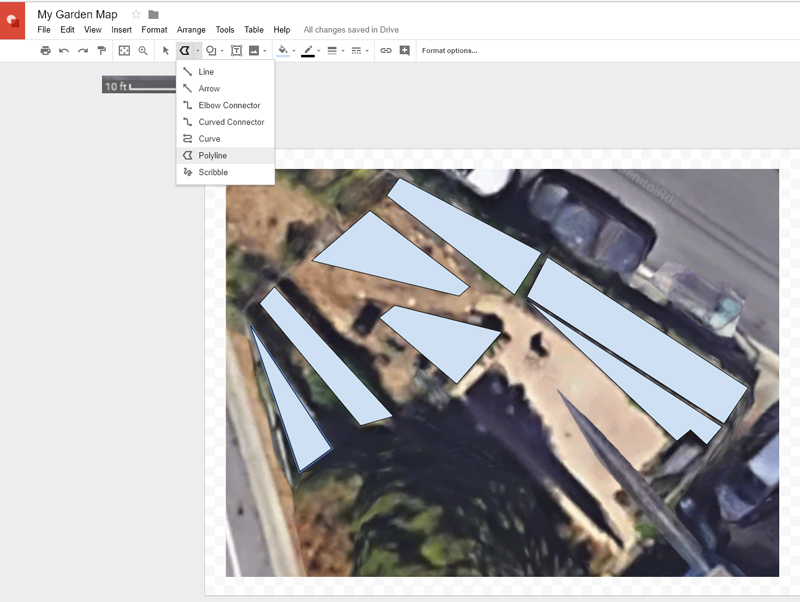
Step 3: Create Your Planting Areas
Now we will trace our garden areas. We can do this in a few ways in Google Drawings, and which works for you will depend on the shape of your garden spaces.
If your garden is very rectangular, use the rectangle shape tool. For circles/pots, the circle tool will be perfect. But if your garden is like mine, it is a bunch of odd shapes, and the free-form line tool called Polyline is going to be your tool of choice. It is a little trickier to use, but remember, you can undo anything easily, so don’t get frustrated.
The Line and Polyline tools are found under “Line” in the menu when you begin in Google Drawings.
My oddly-shaped garden delineated with Polyline. The colors are default, you can change them to whatever you like.
Shapes, like Rectangles and Circles are found under the circle/square icon. I used the circle tool to denote where I have my plant pots.
Step 4: Add Scale to Your Garden
With your garden shapes in place, you can remove the image of your garden. Just in case, let’s not delete the image we used, but instead, make it transparent, using the instructions above in Step 3, Item 1.
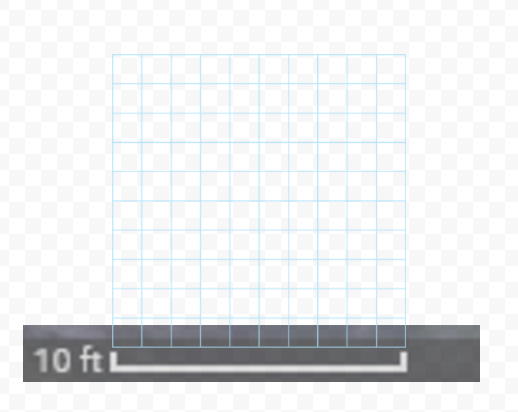
Now, let’s make a grid that will be perfect 1 ft by 1 ft squares to help us view our garden at the correct scale and plan our plant spacing.
I have created a simple grid you can download and use. Download that file, and then import it into your Google Drawing by clicking Insert->Image->Upload from Computer and selecting the grid you downloaded.
We will need that small scale we saved earlier, so bring that back to the viewable area wherever makes sense to you. We are going to resize our grid to fit the scale from the map, which will make our grid equal 1 ft by 1 ft in our garden. Be sure to hold down SHIFT when resizing your grid to keep the squares perfect.
Your grid should look like this when you have it sized properly
Step 5: Save and Print, or, Design Online!
There are two ways to use your scaled garden map.
Drag the grid you created over your mapped areas, copying as many 10 x 10 grids as you need (and lining them up), so that you have a full grid to work with, and then print your garden map out. Use this printed map to draw your garden. Be sure to change the colors of the shapes, their borders, and even the transparency of the grid to get the garden map of your dreams when you print. This is my method of choice—I like to use a pencil and try things out, erase often, and try again and again until I get it perfect.
My Garden with the grid copy-pasted over the whole thing. I changed the borders of my garden to blue, just a little lighter than the grid. I usually print the maps in black & white, but the level of visibility of the blue here will reflect in the printed pages in gray.
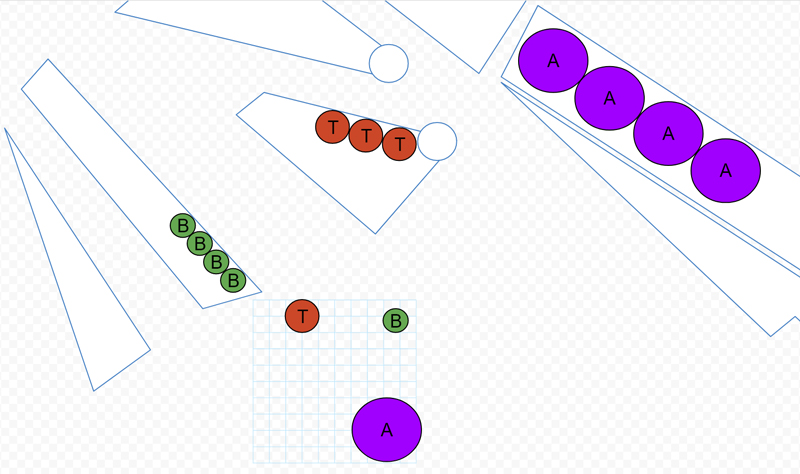
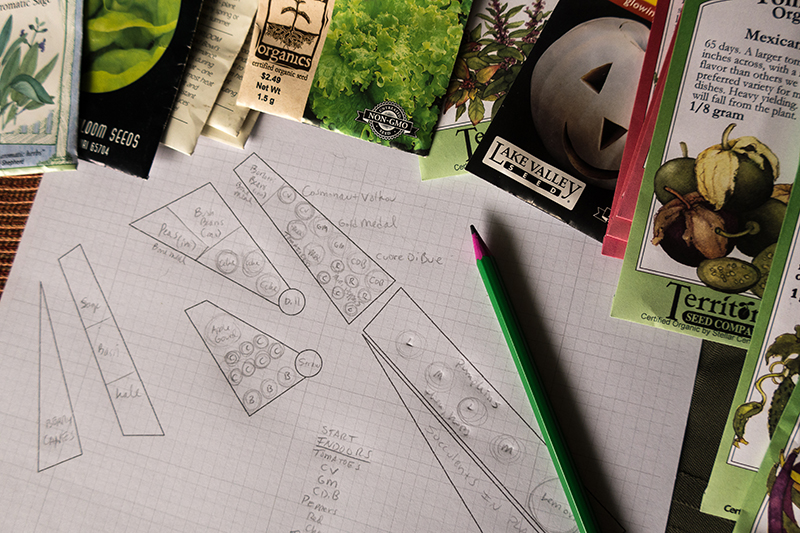
If you’re more technically inclined, or, to plan your garden from any of your devices, you can use the grid to create shapes in the size of planting areas for your plants of choice. Instead of copy-pasting the grid, use it as a size guide for plants. Tomatoes, for instance, need a 2 ft x 2 ft space to grow, Broccoli needs 18 inches (1.5 feet), and Artichokes need 4 ft, and are sized as such in the map below. I used the circle tool, different colors for each plant, and a large letter in the middle of each to help keep it clear which plant is which.You can take this even farther, with a color-coded plant legend, and can reuse the plant sizes you created every year in your new planning maps. If you do anything really cool with your garden plan, I’d love to hear about it!
Designing a garden entirely online for free is possible.
Planning your is probably the most fun part of gardening. It’s where all the dreams and hope for a bountiful year go onto paper, forming the basis for everything that happens after. I hope this tutorial gives you a great map of your garden from which to start your planning. More accuracy in your plant spacing, and ability to save your garden maps every year will hopefully give you a more successful and healthful garden in the seasons to come!
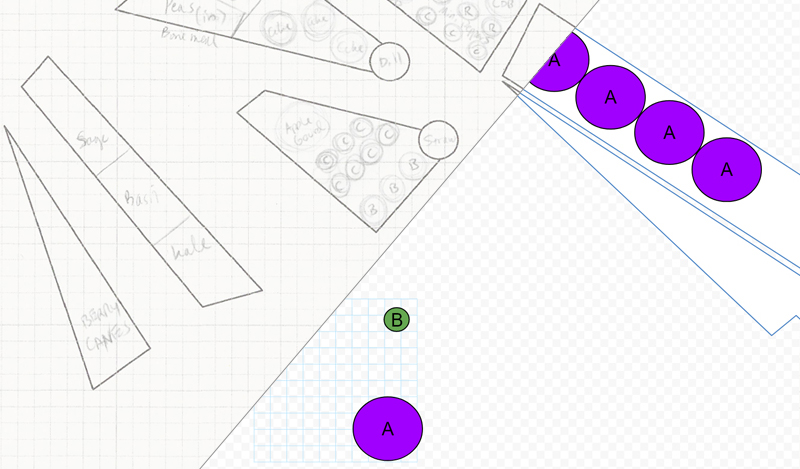
My 2018 Garden Plan, a work in progress

 Now, zoom in as far as you can go without the whole scene jumping to “street view,” which is when it looks like you’re standing next to your yard. If you go too far, zoom back out by clicking the “-” button on the bottom right. You should see the 10 ft scale on the bottom right. This is important, because we need this scale to keep our map to-scale, and it means you are zoomed in as far as you can go.
Now you should see an actual photo of your yard. Looking at that photo, is your garden area clearly delineated? If yes, move on to Step 2.
Now, zoom in as far as you can go without the whole scene jumping to “street view,” which is when it looks like you’re standing next to your yard. If you go too far, zoom back out by clicking the “-” button on the bottom right. You should see the 10 ft scale on the bottom right. This is important, because we need this scale to keep our map to-scale, and it means you are zoomed in as far as you can go.
Now you should see an actual photo of your yard. Looking at that photo, is your garden area clearly delineated? If yes, move on to Step 2.
 If not, are there huge tree shadows or other obstructions? Was the satellite photo taken at a time of year where the whole area is just green, so it’s hard to tell where the edges of your garden plots are? Google takes many photos every year, so to get a better image for our mapping needs, we will need to do some extra steps.