Glass Gem Popcorn: A Rainbow in Every Husk

It’s been making the internet news cycles again: Glass Gem Corn (or Glass Gem Popcorn). It is definitely beautiful, and, in the sunnier parts of the Bay Area, easy to grow.
Glass Gem is a flint corn, meaning it is intended to be harvested and used when dried, not fresh. To some, that means waiting longer to use it, but for me, it means I can be super-lazy and leave it on the stalk forever before I even THINK about picking it. Fresh corn is stressful to me–you want to get that perfect moment of ripeness and then run (don’t walk!) it to a pot of boiling water. Flint corn is way more forgiving and involves less cardio.
As a flint corn, you can use Glass Gem for decoration, but also grind it for [cornmeal or flour], or pop it (more on that later).
How to Grow Glass Gem Corn
N.B. these instructions will work for most corn up to the Harvesting section, which is specific to flint or dent (dry) corn.
Planting
Growing corn in the Bay Area is a lot like growing it anywhere else. You plant as soon as you can and hope you get a solid season in. If you look at my Planting Calendar you’ll see I only ever say “early corn.” In most of the foggy areas, only early corn (i.e. short season corn) will have time for a full growing season given the lack of truly hot days. In the sunny areas, you can read that as just “corn,” but be sure to get those seeds in the ground in April, May, or June. I planted in late May last year, and didn’t harvest until late October. That’s far past the “110 Days” on the seed packet. Less guaranteed sunny days means more time to mature.
Choose a full-sun spot in your garden that is protected from wind, if possible. Corn stalks, because of their height, can be knocked down.
You’ll want to plant corn into the ground directly–it does not like to be transplanted. Seeds should be planted between 1″ to 2″ in the soil, and each seed hole should be 12 inches from any other. You can absolutely plant corn in rows or circles, but make sure that they are not in one continuous line. Corn stalks will need to be next to other corn to fully pollinate. I like to plant mine in rectangular or square blocks to maximize pollination, and also to let the stalks protect each other from wind.
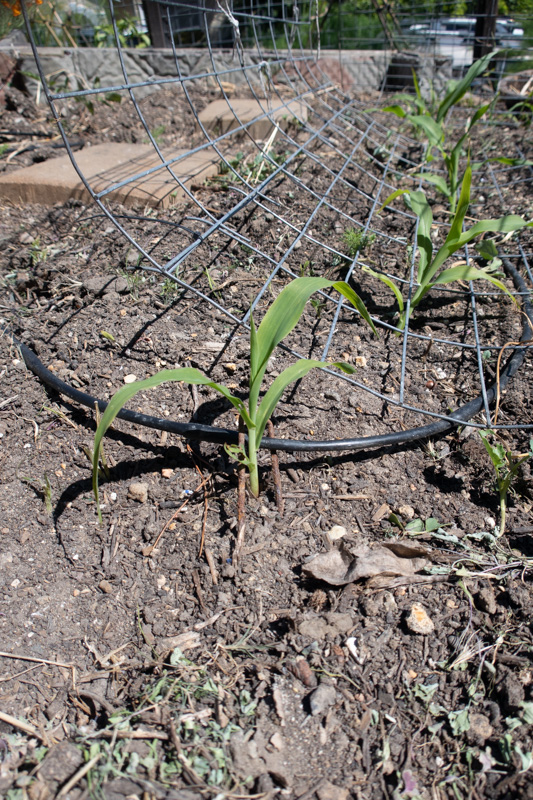
As you keep the planting area well watered, you will see spouts that look like grass (corn is a grass, so this is not just a coincidence!) pop up after about a week. If you like to plant two or more seeds per hole, you may see two little corn sprouts. I’m sorry, but you need to choose your favorite and either ever-so-carefully pull out the other from the soil or snip it off at the soil level. Two corn stalks will never grow well in one space.
Growing

Unless you find a lot of grasshoppers in your yard, your corn should be fairly pest-free as it grows to full size. Ants don’t bother it too much, so don’t freak out if you see them exploring the stalks.
Keep your corn patch well watered. If you have high winds blow through, and one of the stalks falls over, pick it back up and support it as best you can immediately after.
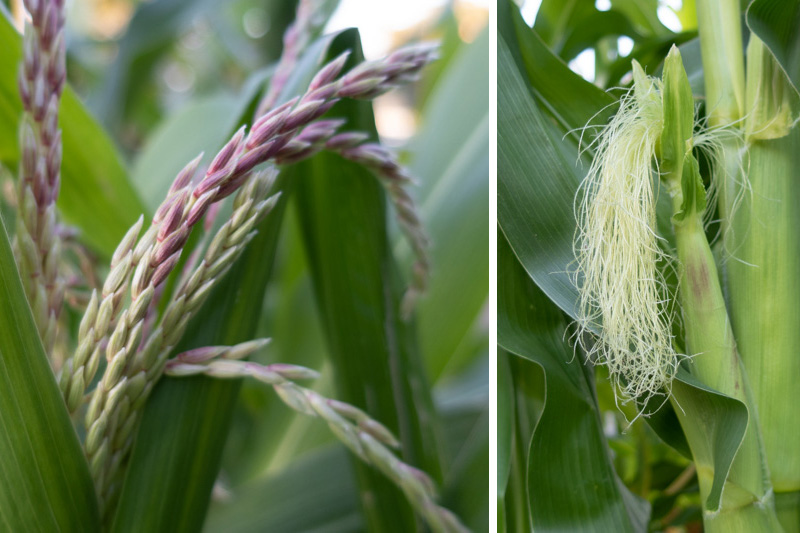
As your corn gets taller, you will start to notice some growth in addition to the leaves: proto-corn ears with silky tassels, and flower stalks (note, these are not necessarily the official terms, but are what I call them). Each of the silk tassels on each potential ear correspond to a single kernel. So, each piece of silk must be visited by a mote of pollen from the flower stalks. Light winds on a dry day can help this process along, but you can also gently tap the flower stalks on a dry but windless day to release the pollen gently down to the tassels.
Protecting
Now that you have pollinated corn ears, you have a new challenge, depending on the critter profile of your garden.
Raccoons love corn. If they discover your corn, they have been known to steal a whole yards’ worth in a few nights. One solution to this issue is duct-taping ears to the stalk. That’s a little too much in opposition to my garden’s rustic aesthetic, so I like a more natural approach: blackberry brambles. I have still never fully tamed my wild Himalayan Blackberry brambles, so I have plenty of thorn-encrusted branches around to place in and around my corn. Raccoons do not like to chance hurting their tiny paws, and so far, although I’ve lost countless unprotected grape harvests to those sly bandits, I have yet to have one ear of corn stolen from a “thorned” cornstalk.
There are some diseases that infect corn and can ruin some ears. Corn smut can infect whole ears, but is rare, while aphids, which are prevalent, usually only mess with the very tops of the ear so are less to worry about. I myself have never seen corn smut or any devastating disease on my flint, fresh, or popcorn grown here.
Harvesting
Unlike corn that is eaten fresh, flint corn like Glass Gem does not need to be harvested right away when the silks are dried up. You get to let your corn stay on the stalk until the husks turn yellow and dry out. In the SF Bay, the only imperative to be aware of is to harvest before the rains are steadily hitting us. Mold will take effect if the weather is too wet, so be sure to get those ears inside before that happens.
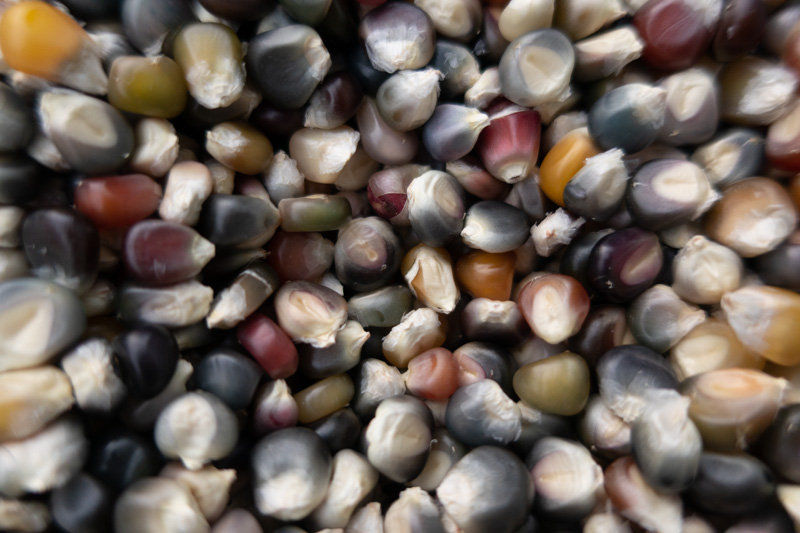
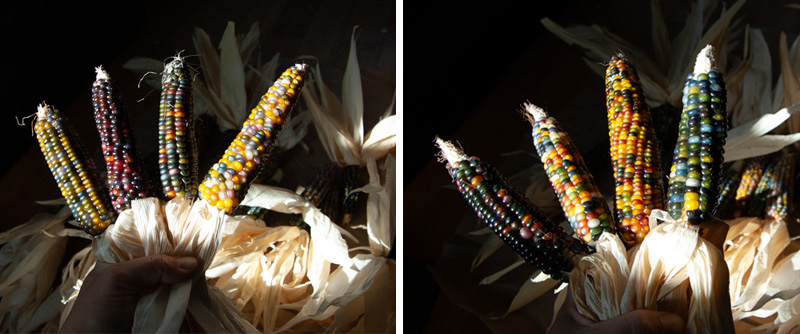
Once you’re harvested, you will probably want to open those husks right away to see the amazing display of gorgeous glowing kernels–and you TOTALLY SHOULD! Ooh and aww over the different varieties you see in just your own harvest. It really is amazing. Just remember to leave the dried husks on each ear!
Now, what to do with those beautiful cobs? Before you go and start popping kernels, you could take some time to create autumn decorations from three kernels tied up with a bow, or go totally all out with a corn wreath.
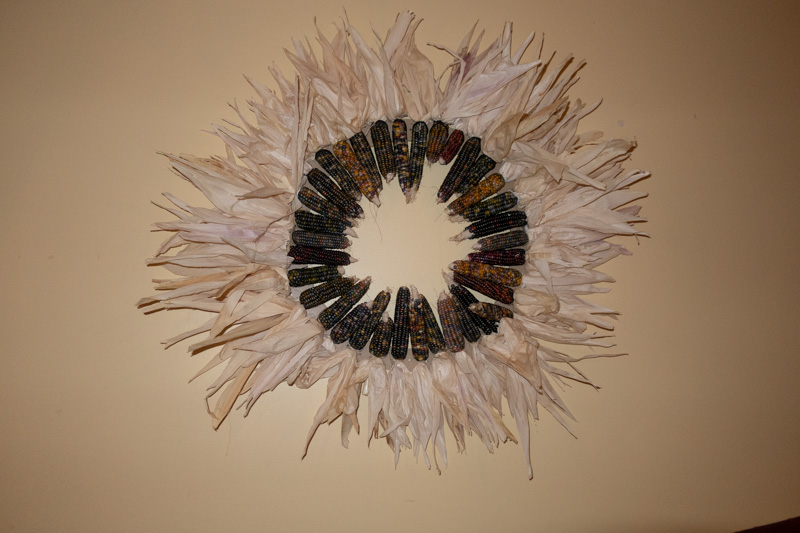
I used a flat MDF craft wreath ring I purchased at a craft store and rubber bands and stretchy hair ties to attach the cobs.
To get the kernels off of the cobs is a bit of a job, I’m not going to lie. One of the best ways to remove the kernels is to take one ear in each hand (aren’t you glad you left the husks on to help you hold them?) and start rubbing them together over a large bowl or stock pot. In a vegetal contest of wills, one of the ears in your hand will start to give up kernels, and you should direct the other ear to force the kernels off the other. I made my kids help, and even took some to the preschool to let the little kids try it. Most of them could do it, for at least a little while. The kernels get EVERYWHERE, and kids love that bit especially.
Once you have painstakingly separated the kernels from the cobs, you will find all sorts of fluffy pieces of dried corn silk and husk mixed in with the corn. This is not ready to be popped as-is, since the papery detritus will burn in a corn popper. To remove it, you get to act like a real old-fashioned farmer and use a light wind (or a fan on low) to “winnow” the corn from the rest of the material. Get two large containers, and, from a modest height above one container, pour the corn from the other container. The wind should catch the lighter material and blow it away, letting only the corn fall in to the lower container. You will need to repeat this multiple times to get rid of most of the unwanted material. Once you can pick up handfuls of kernels and don’t see anything BUT corn kernels, you should be good to go!
Making Glass Gem Popcorn

This variety of corn is sold as “popcorn” by a few seed companies, and it definitely does pop.
I use my air popper to make it, as the microwave-bowl-style does not work with this corn. I have yet to try the stovetop/oil method, which may also work well. Having harvested almost a year ago, and using the air popper, I still get close to a 100% pop rate (but, there are quite a few “half-popped” kernels that I would call “unpopped” because I don’t want to chip a tooth. If you love half-popped popcorn, then this is the variety for you!).

You will see multiple colors in the popped kernels, but it’s a small range that goes between “yellowy-white” and “is that bluish?” The popcorn is very tasty, and seems to have more heft and chew to it than typical popcorn–I’d go as far as to say it is more “meaty” than normal popcorn. It may be just that it doesn’t pop as fully as regular popping corn, but the flavor is also somewhat more in the direction of corn-y products like cornbread.
If you are looking solely to grow your own popcorn, I’d say find a better “popping” variety. If you want a spectacular show when you harvest and a fun, tasty treat later, then definitely give Glass Gem Corn a try.
Where to Buy Popcorn Seeds
The following are all available from Botanical Interests
Glass Gem
Other popcorn varieties