Amongst the drool-inducing nurseries along Route 92 in Half Moon Bay is a sign that seems almost out-of-place between the more trendy, Sunset-style stores. Succulents, Native Plants, and…Carnivorous Plants? If you venture inside, you will find no Little Shop of Horrors, but a sparse space …
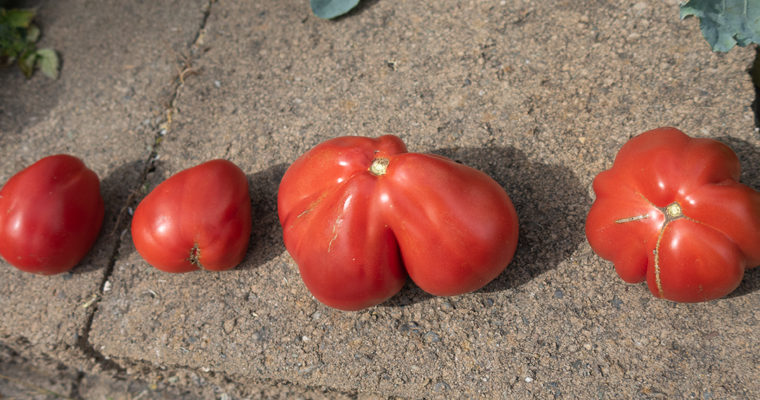
One of my new-to-me plant varieties this year has been the Cuore di Bue Tomato, a paste/sauce variety. The insides are dense, with oxheart-style lobes, and have very few seeds. As with any plant variety you attempt to grow, the fruit is a result of …
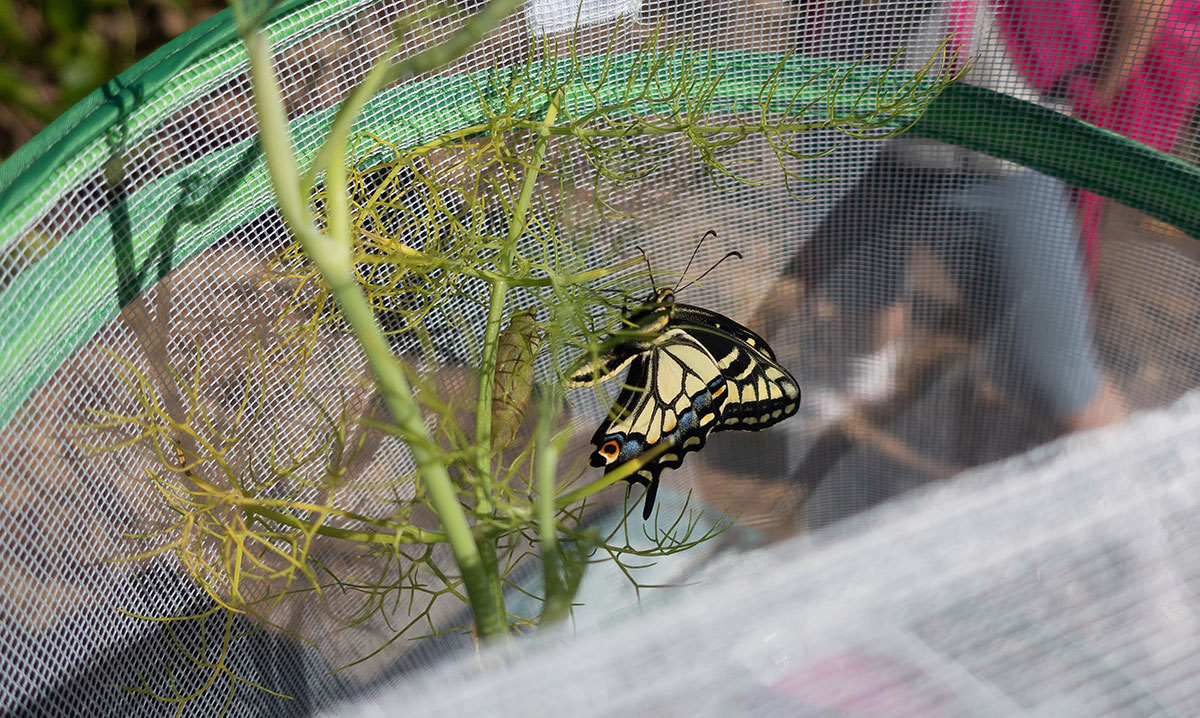
My kids, especially my seven-year-old son, asks me if we can get a pet all the time. The requested animals range from fish, to hamsters (“they poop every 5 minutes!” he says, like it’s a positive attribute), to a new dog (since ours died in April). I don’t want any more pets to take care of, clean up after, or (in the case of small animals that die) dispose of. That is the beauty of raising butterflies: almost no mess, they stay with you only a short time (much of that in their chrysalis), and then they fly away. The perfect temporary pet!
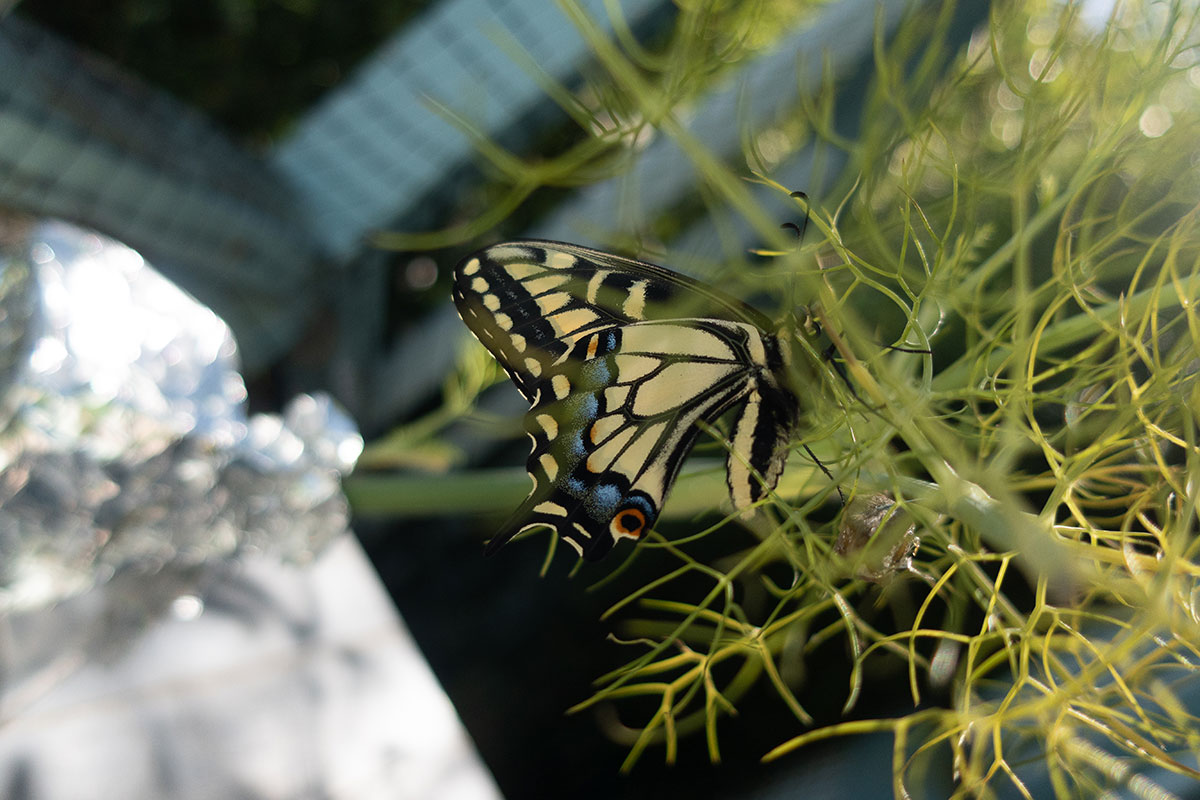
Newly emerged, a swallowtail butterfly slowly explores the enclosure as its wings harden.
Of course, there’s more benefit to having a butterfly in the home, including bringing the outside inside, engaging kids in the garden, talking about insect life cycles, reducing any squeamishness around insects, and teaching about respecting creatures by not touching delicate ones. And, who doesn’t love looking at a butterfly up close?
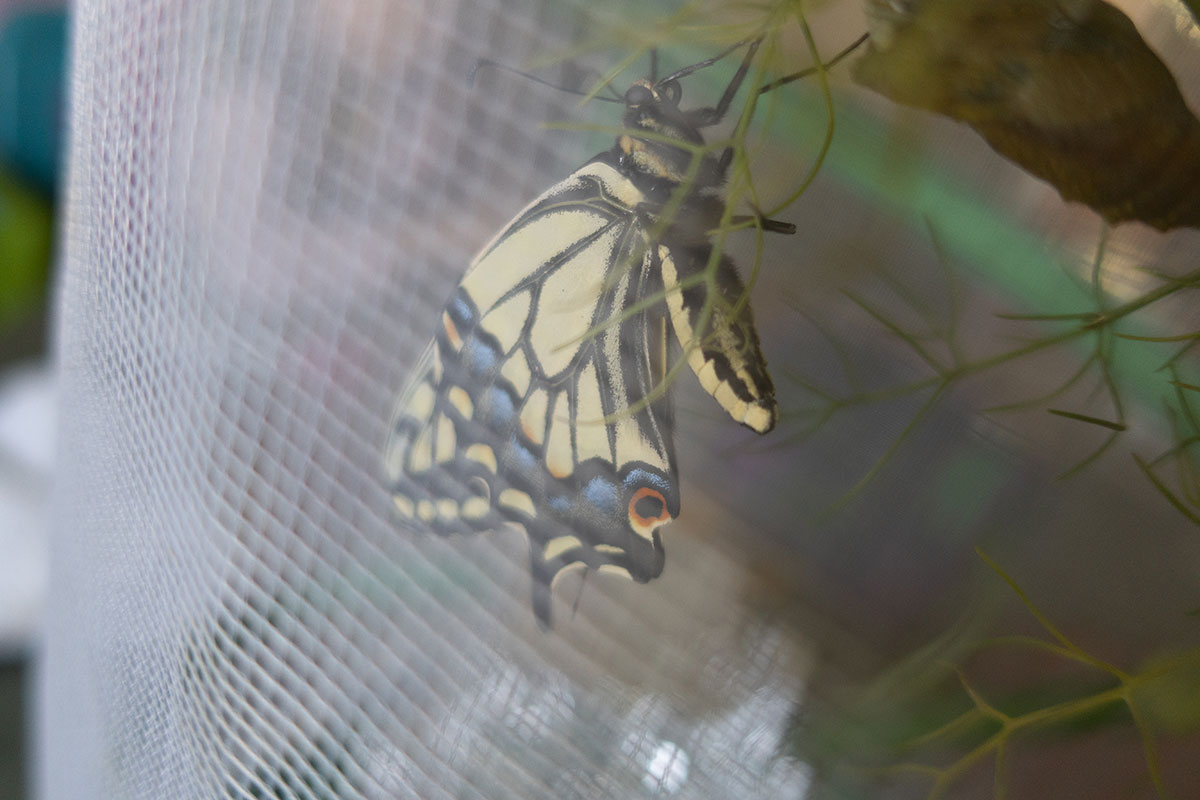
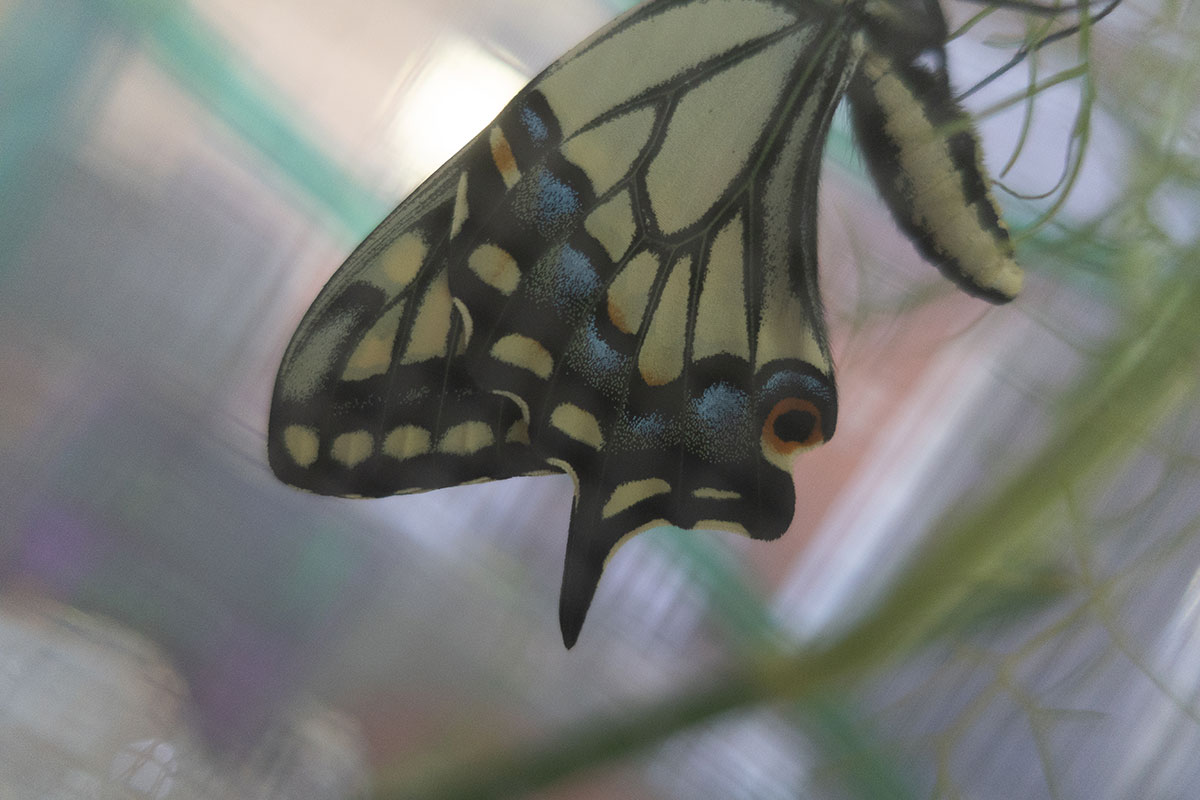
Close up of the wings of a Swallowtail Butterfly
Butterflies are also important pollinators in the garden, and aiding them in their delicate transition could make the difference between survival and becoming a snack.
Finding Swallowtails
The Swallowtail Butterfly starts its life on plants in the carrot family called “Umbellifers.” This family includes carrot, dill, and parsley, and indeed the caterpillars are sometimes called “parsley worms.” Another plant in this family is fennel. As you may know, wild fennel is an abundant weed in the Bay Area, and the very worst weed in my yard and garden. Despite my most violent and merciless eradication efforts, I often have to cut down huge trees of the stuff. When I do, I employ the kids to help me search the stalks and fronds for Swallowtail eggs, caterpillars, and chrysalises. Those that we find, we place in a special enclosure with a plate underneath (most enclosures have a soft base), and a container of water to keep some cut fennel alive for the caterpillars to eat.
If you do bring a caterpillar into your home, be aware that you should always cover the water with foil or plastic wrap to ensure a very clumsy caterpillar doesn’t become a very drowned caterpillar.
Caring for Caterpillars
All the caterpillars need is fennel or dill fronds to eat. They should be fresh, so when one stalk wilts, bring in a new one and then remove the old ones when the caterpillar moves to the newer stalks. The caterpillars will eat (and eat and eat), and it is adorable, and then they will poop a lot. Luckily, all they eat is fennel, so it’s pretty dry and boring poop, but it is spherical and will roll off of surfaces.
When the caterpillar is plump and full, it will choose a sturdy place from which to hang his chrysalis. Starting out, this will look like it just glued its feet to a stalk or wall of the enclosure and made itself a thin seat belt to hang from. Slowly, the chrysalis will turn solid green and then a light brown. It is fairly sturdy, but don’t jostle the chrysalis. Keep the enclosure safe, away from direct sunlight, for about two weeks, but be sure you’ll be checking in regularly. Butterflies are fairly quiet, and you don’t want to miss noticing the emerged butterfly.
Releasing the Butterfly
The newly-mobile butterfly will need a few hours to get its wings ready for flight, but once it emerges, plan on releasing it in a few hours. When you see the butterfly attempting to fly, you’ll know it’s ready for the big wide world.
Our latest butterfly, just before flying away. You can see the open chrysalis just to its left.
If you need to leave the butterfly in it’s enclosure for a long period of time, such as if you have to go to work, leave some cut citrus fruit or a small container of sugar water (large ones might allow an awkward new butterfly to drown!) in the enclosure. However, you should plan on a release as soon as possible after the wings are ready.
Housing a caterpillar and releasing a butterfly is a wonderfully fulfilling activity for kids and adults alike, so keep an eye out for those adorable caterpillars when you are hacking that fennel!
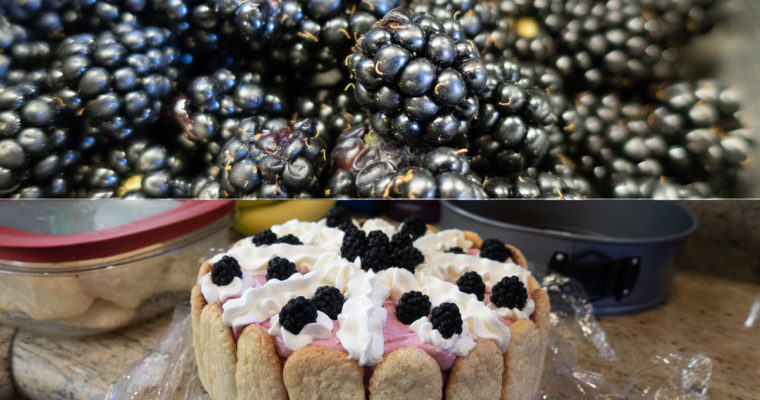
…make a Charlotte Russe!* Part of my yard has been going wild since my kids were born, and there is a thicket of Himalayan blackberry coming into season. I’m never content to make jam or jelly, and you can only have blackberry pancakes 3 or …
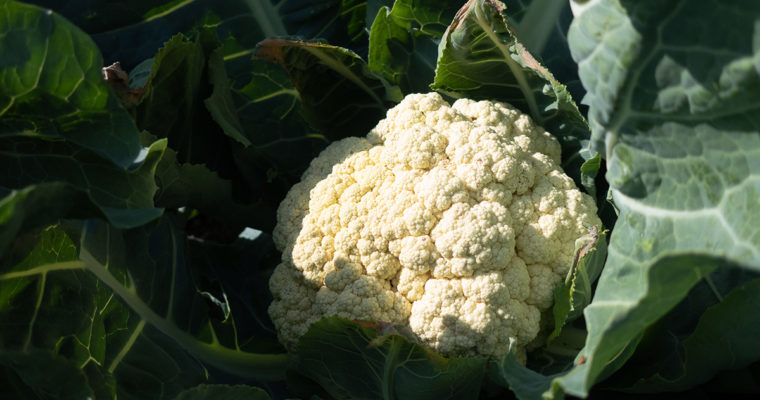
Organic Gardening is incredibly rewarding, but there are those moments when you question the amount of work you put into it. Harvesting heads of cauliflower is one such moment. When to Harvest Cauliflower, when ready to harvest, are fully sized at about 6 to 8 …
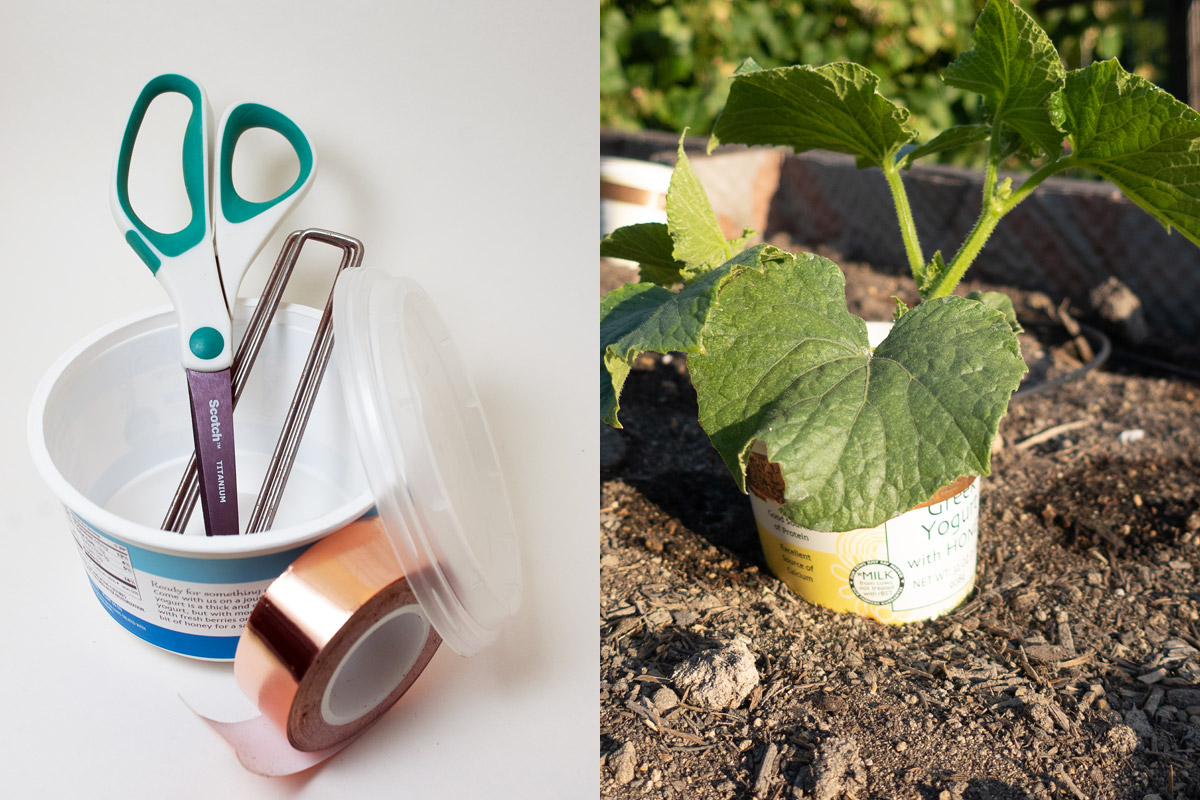
Slugs (and Snails) eat baby plants. They love tender infant beans and cucumbers and totally ruin all that hard work you did weeding and composting and planting. So many plants are just easier to direct-sow into the ground or pot, and starting beans inside seems so asinine given how well they do in the ground. It’s just those darn slugs, screwing it up for everyone.
There are products like Sluggo and beer traps, and other things that may help keep the slimy buggers under control by killing them. I even tried using cabbage collars, which have copper embedded in them, but they are flimsy and on first big windy afternoon, I found them on every plant BUT the ones I had placed them on. They also only work on sprouted, established plants.
But no worries: I have found the best way to protect baby plants from slugs and snails. It’s cheap and easy to implement, and doesn’t involves killing slugs or snails:
I make slug force fields–devices that go around my seeds and baby plants–that slugs just don’t want to touch.
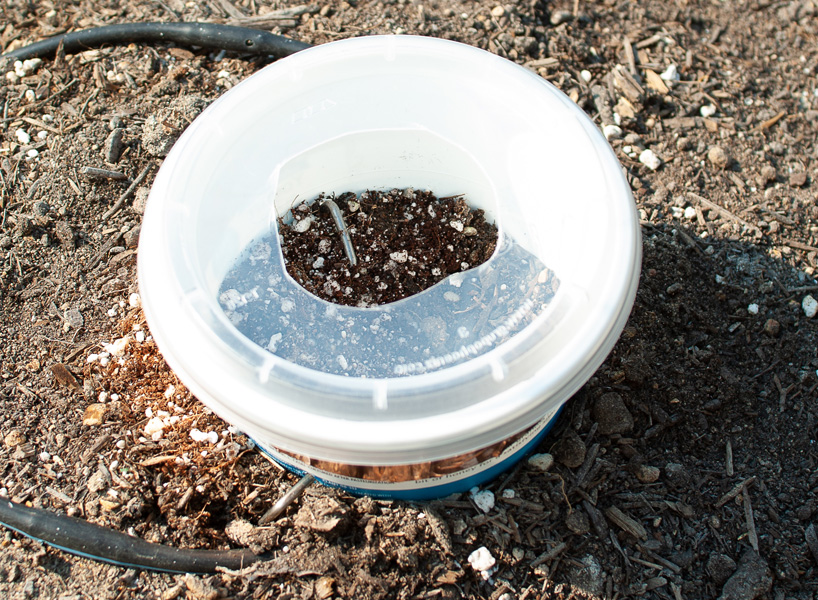
A completed force field in the ground, ready to protect some seedlings!
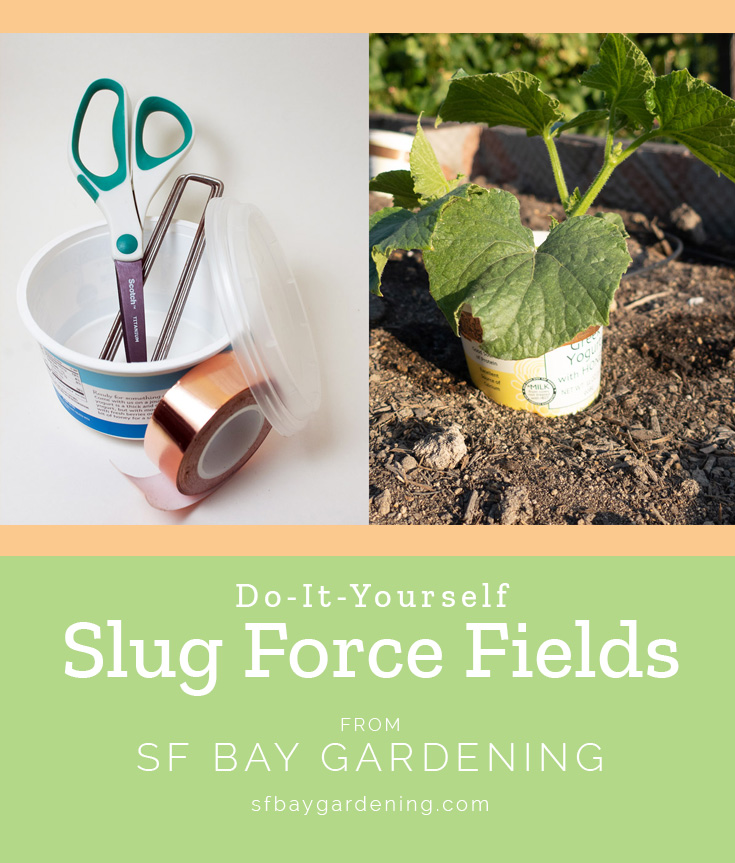
DIY Slug Force Field
You’ll need:
scissors
a plastic yogurt container or similar container
2 or 3 ground staples or something else that will anchor the force field to the ground
copper tape that’s at least an inch wide
the lid of the container, which can be used to make the force-field double as a greenhouse for your seeds & sprouts (optional)
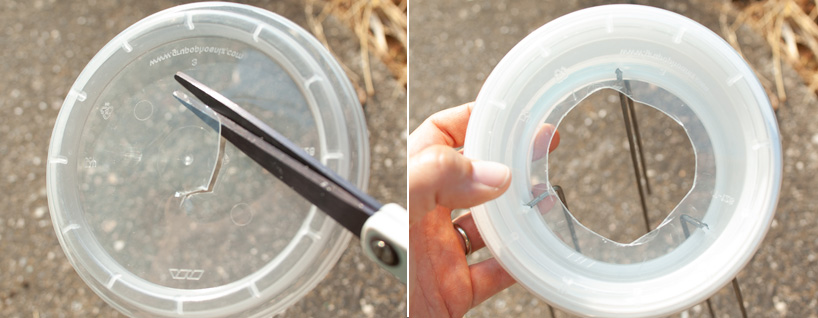
Step 1:
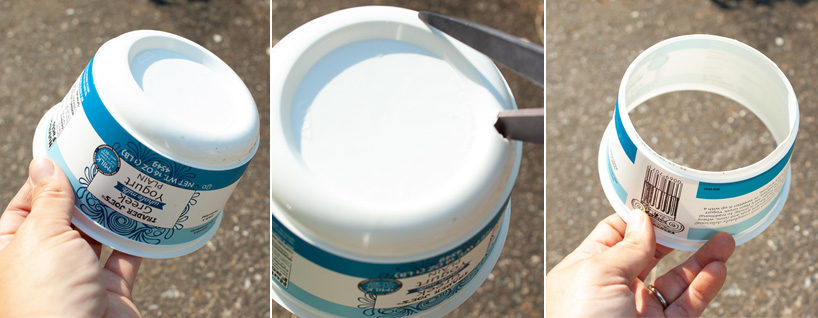
Cut off the bottom
Using scissors or a knife, cut away the bottom of the container.
Step 2:
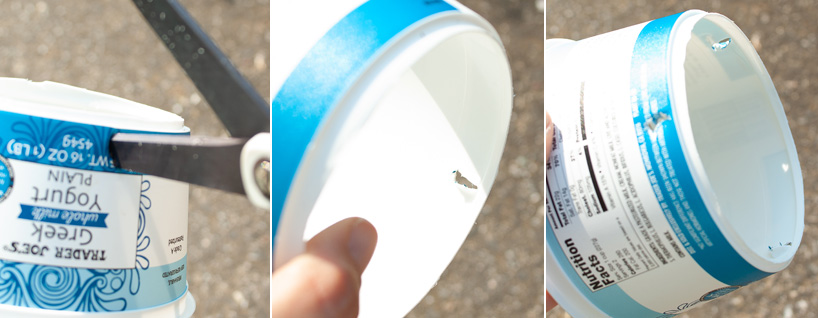
Poke 2 or 3 holes near the base, about a 1/2 to 1 inch from the base.
Using scissors of a knife, cut small holes that will allow ground staples to slide through. They do not need to be pretty!
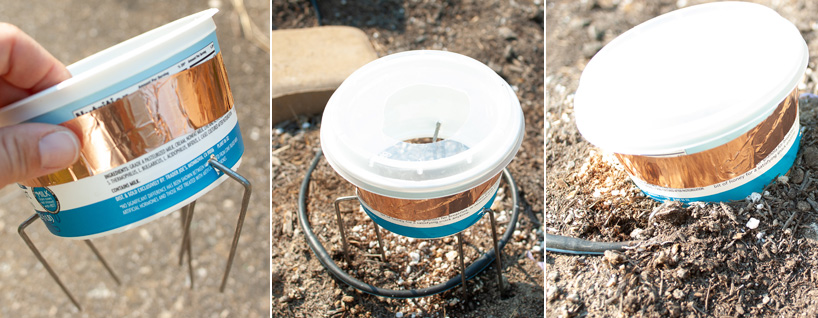
Step 3:
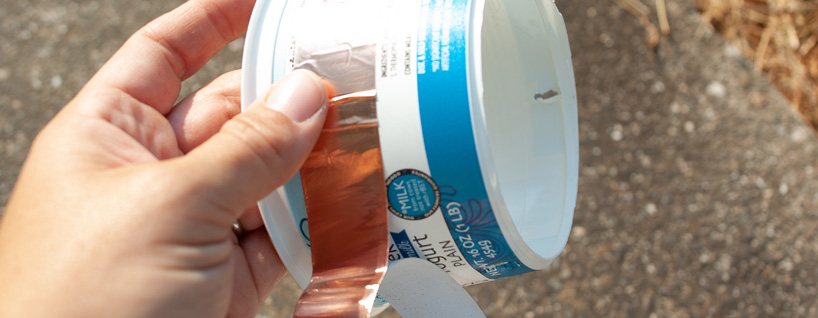
Wrap the container all the way around with copper tape, in the middle closer to the top. Overlap at the edges, and flatten the tape out as best you can.
Measure your tape before you cut so that you can be sure you have enough with slight overlap at the edges.
Step 4 (optional):
To benefit from a bonus greenhouse add-on, cut a hole in the center of the lid. This works with clear or opaque lids, and it depends on how hot your area gets. The sun in Brisbane can be too hot for tender sprouts in a greenhouse, so I sometimes use the clear lids, but add duct tape to darken the lid. The moisture stays inside, helping seeds sprouts, but I don’t have to worry about roasting the baby plants.
Be careful not to crack the lid, just cut. The hole is crucial to keep the plants from burning by venting hot air.
Step 5:
Insert the staples into the holes, drive the staples into the ground, and settle the force field onto the soil, ensuring the bottom edges are touching or even into the ground. You can pile soil up around the outside if you need to. No gaps allowed!
Carefully put in place in the garden, leaving no gaps between the edges of the container and the soil.
Step 6:
Plant your seeds or transplant seedlings and water. You’re done!
How does it work?
Slugs/snails are gross and wet, as you may have noticed, and their slime contains ions that, when touching copper, creates an electric shock in the slug/snail. The shock is unpleasant, so they won’t keep going when they feel it. Thinner lines of copper may allow them to cross by not providing enough contact, so I always use an inch wide or wider to repel them.
Best Plants for Slug Force Fields
I love these for plants that benefit from being sown in the ground, like pumpkins, cucumbers, squash, and even beans, but it would also work for brassicas like broccoli, cauliflower, kale, and any other plants you might otherwise find eaten down to a nub in the morning.
Maintenance
These force fields are pretty maintenance-free. The copper gets tarnished over time, but I’ve used them for more than one season with success. The plastic will eventually break down after repeated years in sunlight, but making them is cheap and easy.
While plants are young, you do need to ensure that no pathway forms for slugs after the planting until the spouts are big enough to be safe. That means a stick or leaf that makes a bridge, or something jarring the container so that a tunnel forms underneath. Containment is key!
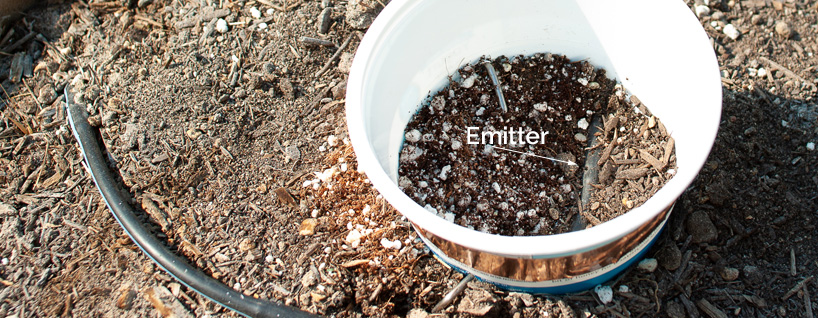
Using with drip lines
With my drip irrigation lines, I have had to carefully bury them, then bring up the emitter inside the container, and then bury on the other side. I use more ground staples for this, and it makes seed-starting very easy, because if you forget to water the seeds at that critical sprouting time, slugs aren’t your biggest problem.
Drip lines can be buried, and then emitters allowed inside the force field.
Let me know if you try out some slug force fields in your garden, and I’d love to know if you have any improvements on them!
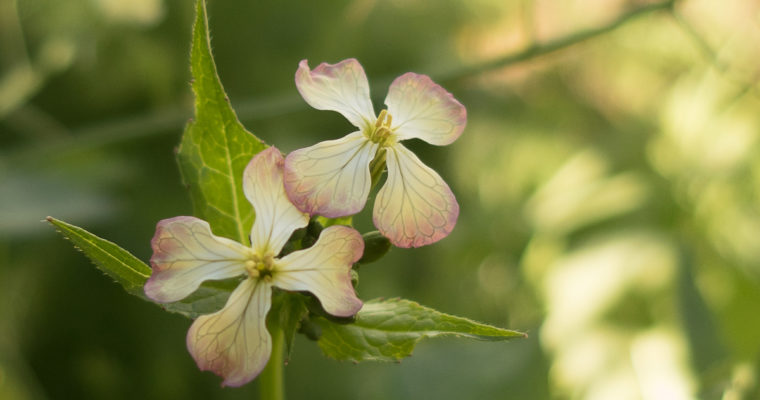
You’d think the folks that sell seeds would know better than to collect and package weed seeds for sale, but they clearly don’t. There are plants that, in the Bay Area, at least, are meddlesome weeds, and yet companies sell them as ornamental flowers and …
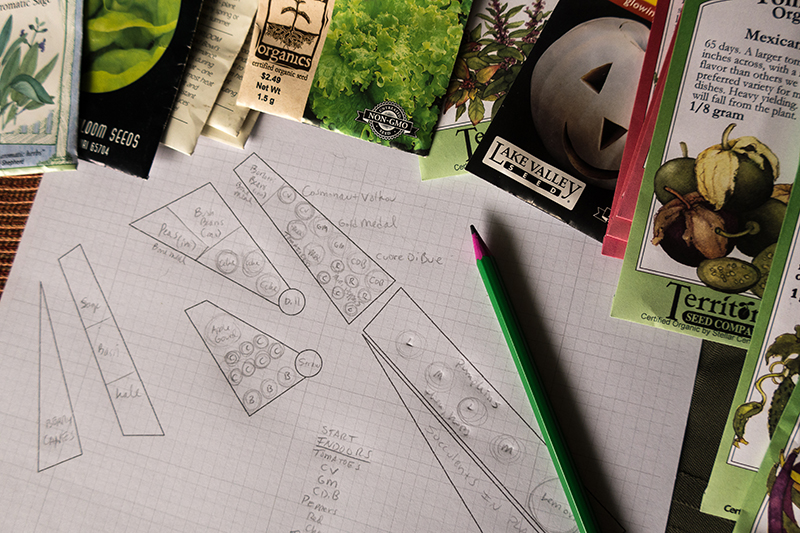
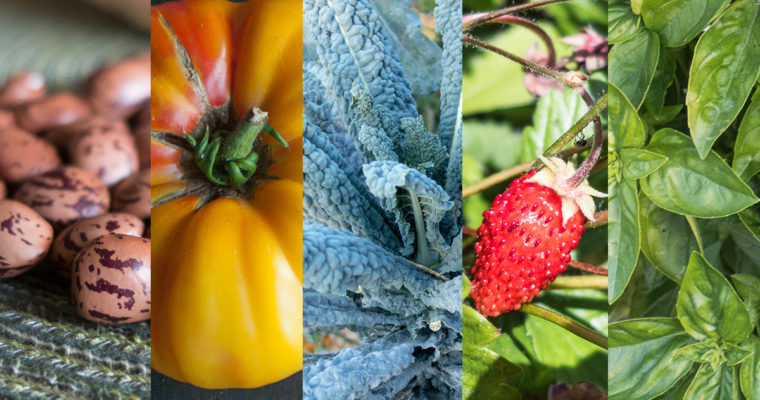
After much deliberation, I finalized my garden plan for this year. I used the map I created using Google Maps (see how to do this yourself here), organized my seed collection, and purchased the new seeds I need. The Plants I’ll be growing many of …
Planning your garden can be tricky if you don’t have a simple rectangular plot. I have seen many multi-level and odd-shaped gardens in the Bay Area, and mapping out accurately what you can plant in those configurations is not easy. Even the garden software you can purchase will require you to measure your spaces, and if you have several, that’s a lot of time spent. My own garden is a multi-level area that includes non-rectangular raised beds and other kooky shapes. For years I roughly sketched out my garden plans on graph paper, and I often got my plant spacing wrong. Then, a few years ago, I realized my garden was already mapped, and I could have a perfect, free, and accurately-scaled version of my garden to plan on using Google Maps!
Step 1: Find and Screenshot Your Garden Map
Go to maps.google.com and enter your address. There might be a simple picture of your house or building next to the street, but that doesn’t help us with your actual garden.
Map View of your home & garden. Not super useful.
At the bottom of the screen, click the “Satellite” square button.
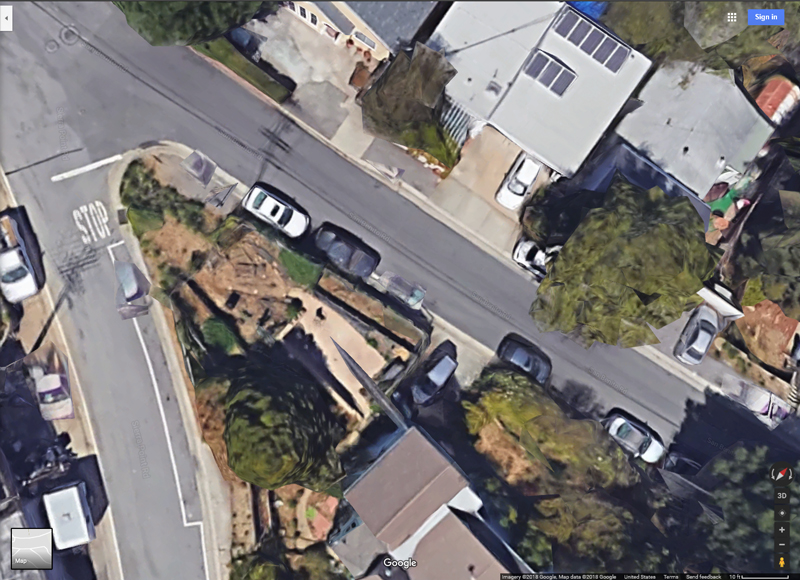
Now, zoom in as far as you can go without the whole scene jumping to “street view,” which is when it looks like you’re standing next to your yard. If you go too far, zoom back out by clicking the “-” button on the bottom right. You should see the 10 ft scale on the bottom right. This is important, because we need this scale to keep our map to-scale, and it means you are zoomed in as far as you can go.
Now you should see an actual photo of your yard. Looking at that photo, is your garden area clearly delineated? If yes, move on to Step 2.
If not, are there huge tree shadows or other obstructions? Was the satellite photo taken at a time of year where the whole area is just green, so it’s hard to tell where the edges of your garden plots are? Google takes many photos every year, so to get a better image for our mapping needs, we will need to do some extra steps.
Using Google Earth to Update Our Photo
You will need to install Google Earth Pro on your computer to get the Timeline feature to change your view. Strangely, adjusting this view on your computer will then update your browser view, so that you can take the aerial photo we need with the scale in the right bottom corner. When you’ve successfully found a photo that will show you your garden as best it can, move on to Step 2.
Step 2: Tweak Your Map in Google Drawings
Google Drawings is part of Google Drive. You will need a Google login to use it (If you use photo-editing software, like Photoshop, feel free to use it instead—I chose to demonstrate using Google Drawings because it is free and widely available). There are instructions on creating a Google Account here. If you are logged into Google on your browser, this link will open a new Google Drawings document for you. Give it a name!
While viewing your map on Google Maps, copy your screen:
On a Windows Computer, hold down the Alt key and press Print Screen
On a Mac, it’s Command+Control+Shift+3 to save your screen to the clipboard
Now, in Google Drawings, hold down the Ctrl key and press the V key (PC) or Command + V (Mac)
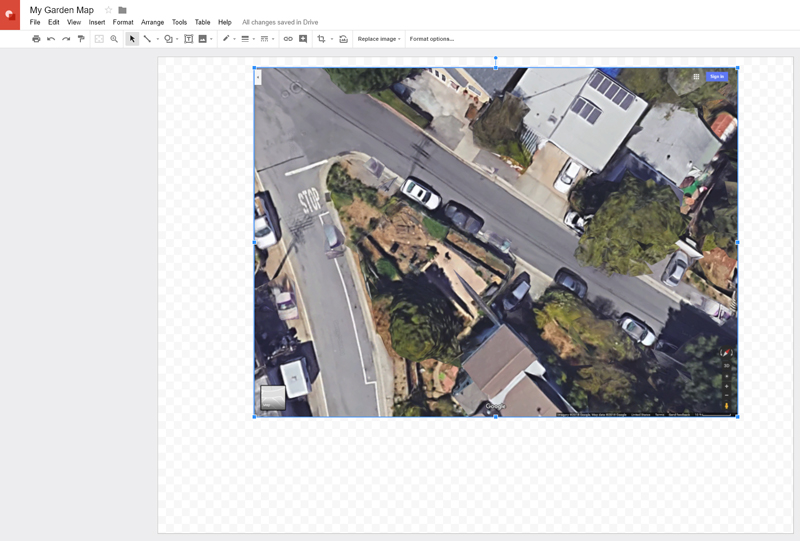
Name your Google Drawing File and paste in your map screenshot. My map here is a little different, as I already removed the browser header by using the crop tool.
You should now see your image in Google Drawings. While in Google Drawings, we need to make sure we can do two things: Trace our garden spaces AND get an accurate map scale. To make this easier, I recommend resizing the image in to fill the page, then copy-pasting another copy on top.
To resize your map, click on it, then, while holding down the SHIFT key, drag a corner. Holding SHIFT makes sure you don’t stretch or squash your image. Keep doing this until your garden area just about fills the page. If you have trouble telling where the page edges are, you can adjust the transparency: right-click the image, select “Format Options”, and choose “Adjustments” to get the Transparency slider.
Using the transparency slider, you can find the edges of the page. I also recommend trimming the map down to the page after you get your scale measure
Zooming Out (View->Zoom>50%) can also be very helpful when getting the map to the size you want, as well as cropping the top and left of the image (remember, you need that scale on the bottom right to remain!).
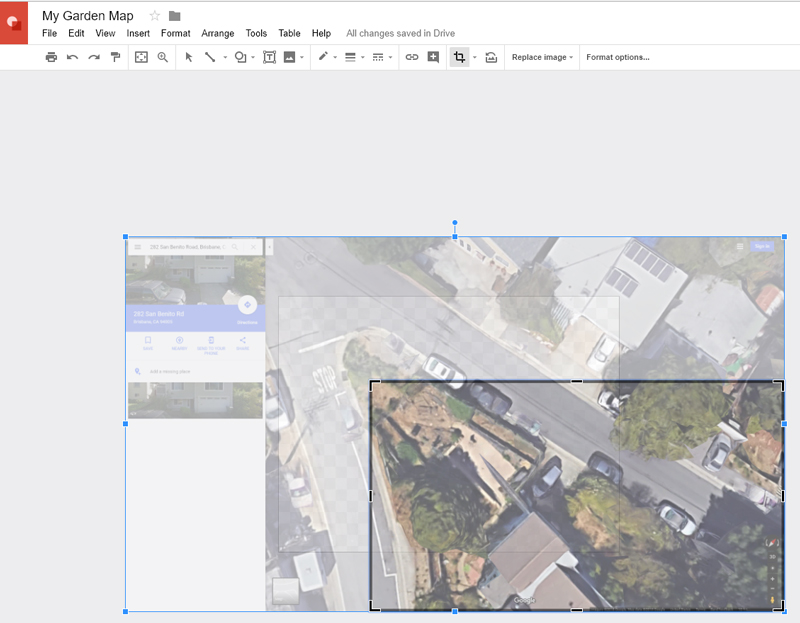
The CROP icon is highlighted in the toolbar. Be sure to only trim the top and left! When you crop, you select the portion of the picture you wish to keep.
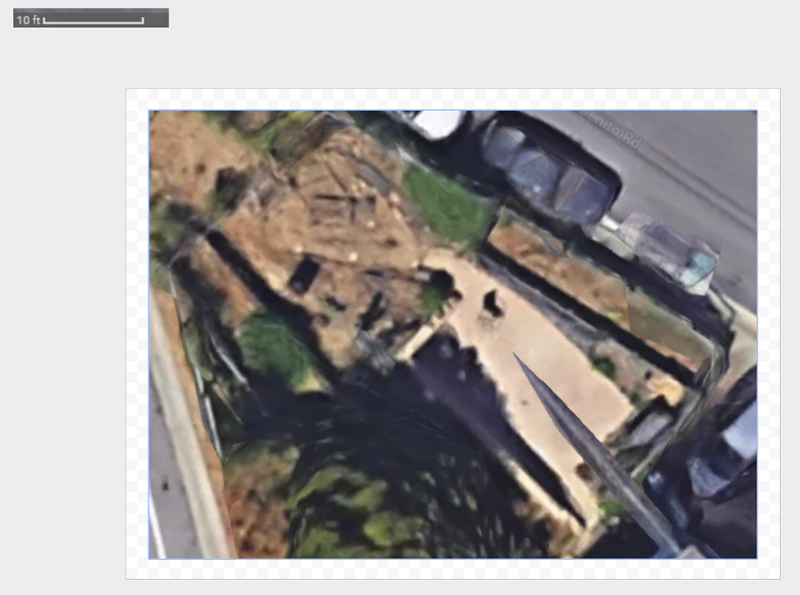
Copy and paste another of your maps on top of the first. This top copy will be for our scale, and the bottom for the garden map. Using the crop tool, crop the top image down to only show the 10 ft scale. You may have to drag the image up a bit to get it into the viewable area. Once you have this small scale cropped, drag it out of the way.
My garden, fully filling the page and the scale safely at the top left.
Step 3: Create Your Planting Areas
Now we will trace our garden areas. We can do this in a few ways in Google Drawings, and which works for you will depend on the shape of your garden spaces.
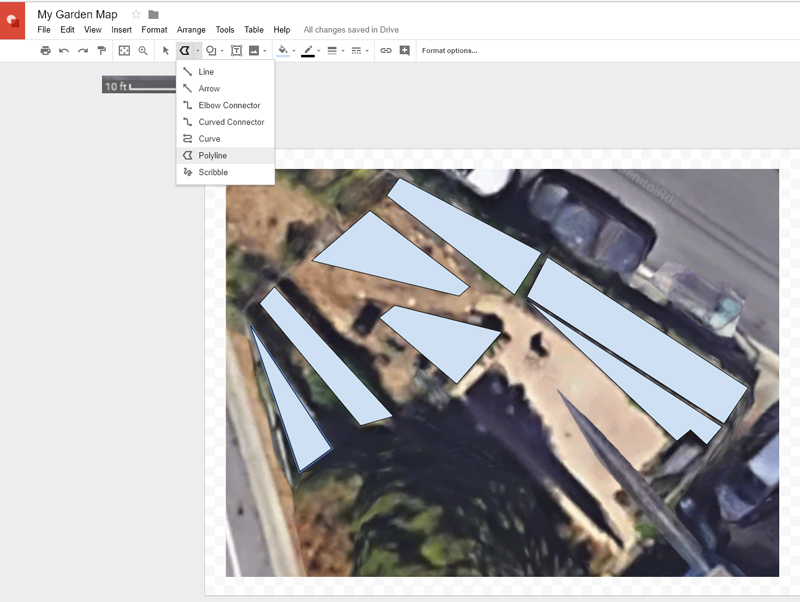
If your garden is very rectangular, use the rectangle shape tool. For circles/pots, the circle tool will be perfect. But if your garden is like mine, it is a bunch of odd shapes, and the free-form line tool called Polyline is going to be your tool of choice. It is a little trickier to use, but remember, you can undo anything easily, so don’t get frustrated.
The Line and Polyline tools are found under “Line” in the menu when you begin in Google Drawings.
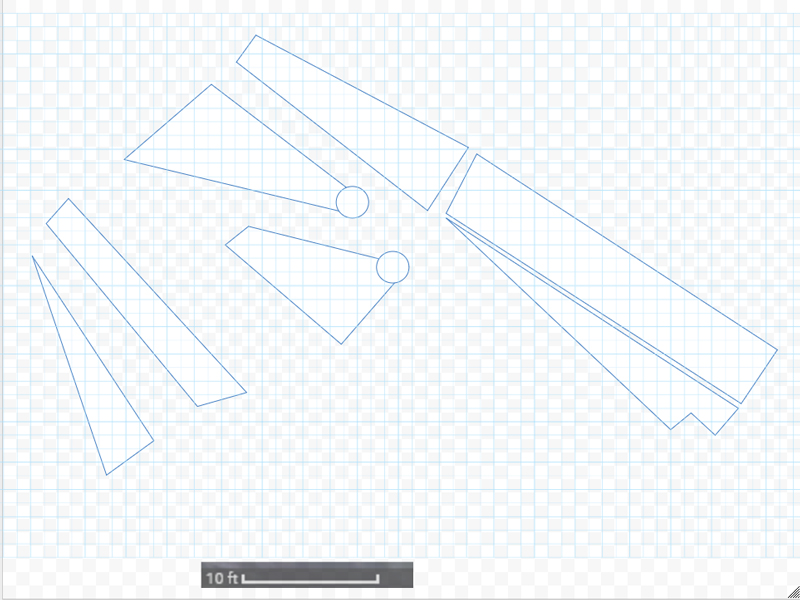
My oddly-shaped garden delineated with Polyline. The colors are default, you can change them to whatever you like.
Shapes, like Rectangles and Circles are found under the circle/square icon. I used the circle tool to denote where I have my plant pots.
Step 4: Add Scale to Your Garden
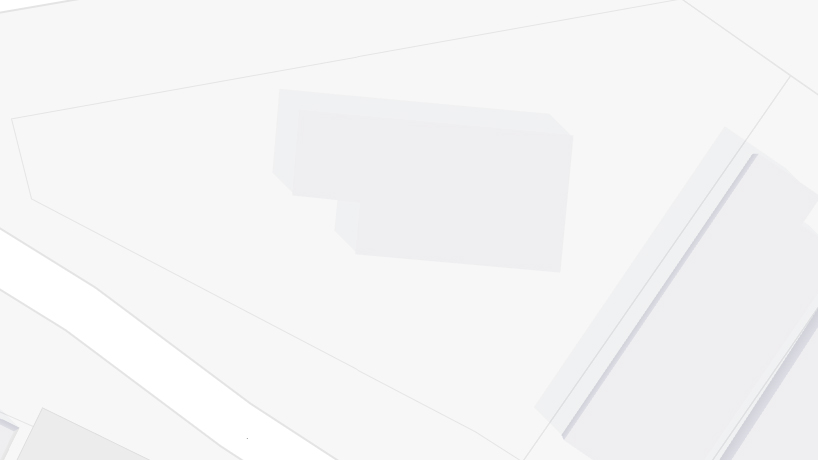
With your garden shapes in place, you can remove the image of your garden. Just in case, let’s not delete the image we used, but instead, make it transparent, using the instructions above in Step 3, Item 1.
Now, let’s make a grid that will be perfect 1 ft by 1 ft squares to help us view our garden at the correct scale and plan our plant spacing.
I have created a simple grid you can download and use. Download that file, and then import it into your Google Drawing by clicking Insert->Image->Upload from Computer and selecting the grid you downloaded.
We will need that small scale we saved earlier, so bring that back to the viewable area wherever makes sense to you. We are going to resize our grid to fit the scale from the map, which will make our grid equal 1 ft by 1 ft in our garden. Be sure to hold down SHIFT when resizing your grid to keep the squares perfect.
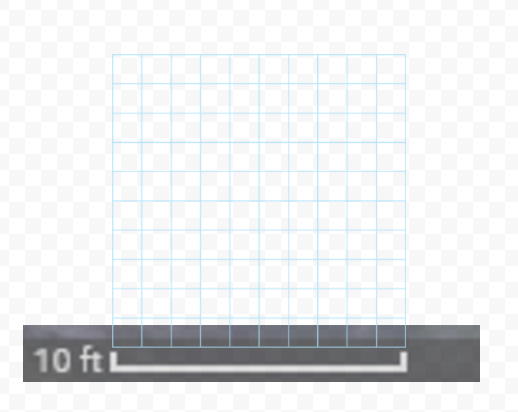
Your grid should look like this when you have it sized properly
Step 5: Save and Print, or, Design Online!
There are two ways to use your scaled garden map.
Drag the grid you created over your mapped areas, copying as many 10 x 10 grids as you need (and lining them up), so that you have a full grid to work with, and then print your garden map out. Use this printed map to draw your garden. Be sure to change the colors of the shapes, their borders, and even the transparency of the grid to get the garden map of your dreams when you print. This is my method of choice—I like to use a pencil and try things out, erase often, and try again and again until I get it perfect.
My Garden with the grid copy-pasted over the whole thing. I changed the borders of my garden to blue, just a little lighter than the grid. I usually print the maps in black & white, but the level of visibility of the blue here will reflect in the printed pages in gray.
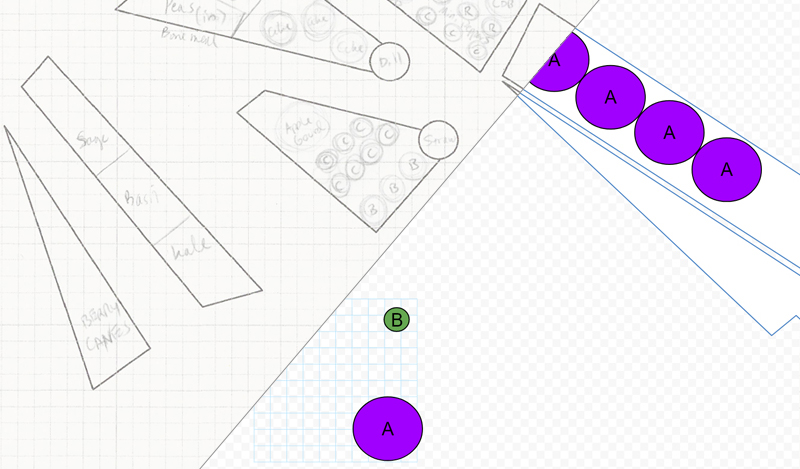
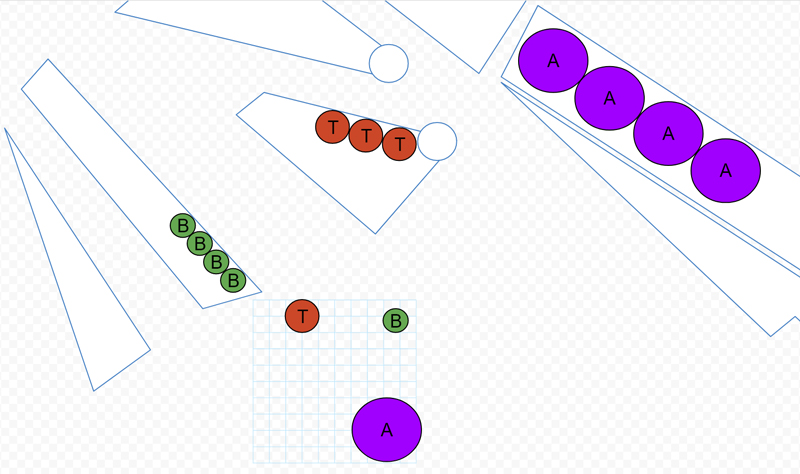
If you’re more technically inclined, or, to plan your garden from any of your devices, you can use the grid to create shapes in the size of planting areas for your plants of choice. Instead of copy-pasting the grid, use it as a size guide for plants. Tomatoes, for instance, need a 2 ft x 2 ft space to grow, Broccoli needs 18 inches (1.5 feet), and Artichokes need 4 ft, and are sized as such in the map below. I used the circle tool, different colors for each plant, and a large letter in the middle of each to help keep it clear which plant is which.You can take this even farther, with a color-coded plant legend, and can reuse the plant sizes you created every year in your new planning maps. If you do anything really cool with your garden plan, I’d love to hear about it!
Designing a garden entirely online for free is possible.
Planning your is probably the most fun part of gardening. It’s where all the dreams and hope for a bountiful year go onto paper, forming the basis for everything that happens after. I hope this tutorial gives you a great map of your garden from which to start your planning. More accuracy in your plant spacing, and ability to save your garden maps every year will hopefully give you a more successful and healthful garden in the seasons to come!
My 2018 Garden Plan, a work in progress
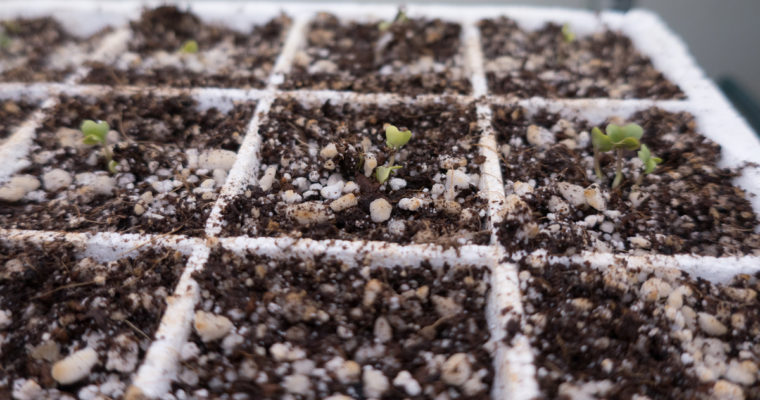
In my last post, I talked about the benefits of gardening that help outweigh the expense. Gardening takes time as well as money, in the form of equipment, soil amendments, fertilizer, and water. One of the ways I noted that makes gardening worth it anyway …

