Growing Basil for Fun and Pesto
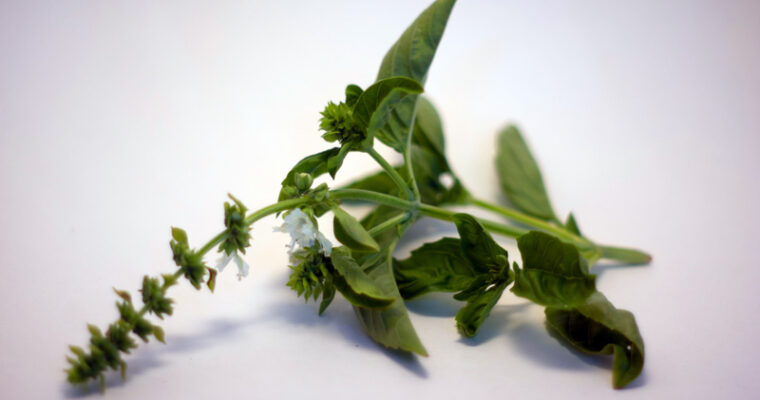
Basil is one of those plants I feel like I can never grow too much of. I always start a ton of seedlings early and then plant all of them. This is unlike other plants, like tomatoes, where I only plant a few of the …
Exploring everything green beneath the fog
Basil is one of those plants I feel like I can never grow too much of. I always start a ton of seedlings early and then plant all of them. This is unlike other plants, like tomatoes, where I only plant a few of the …
I’m sure you’ve seen the “tiny” plum trees around in the Bay Area. Not tiny trees, but trees that produce tiny plums.
If you have one of those plum trees in your yard, or know of a “wild” plum tree somewhere nearby, you may have picked them, snacked on them, and even used them in jams in jellies. I know that here in Brisbane, we have many of these trees where the fruit is about the size of a small cherry, and the flavor is tart until it’s suddenly bland (when overripe). It’s definitely not a favorite fruit of mine.
Our yard has one such tree and I have struggled to make use of the not-great, tedious-to-use, annoyingly abundant fruit every year. I have made so much jam. My family doesn’t even EAT jam. All my mason jars of full of that useless stuff. I just hate wasting the fruit!
Thankfully this last year, I happened upon a recipe for Japanese plum wine. While we may not enjoy sweet jams, my husband, friends, and I enjoy sweet alcoholic drinks. The tangy, subtle flavor and almost syrupy mouthfeel of Japanese plum wine makes it a special treat (and, indeed, it should be consumed in small quantities unless you like hangover headaches). It’s also great in cocktails that let the flavor shine but add sparkle and/or contrast to those delicate plum notes.
Have you never had plum wine? If you enjoy sweet alcoholic drinks, like gimlets, port, sweet German wines, or mead, then I think you would love plum wine.
Traditional Japanese plum wine is made from 3 ingredients:
Last year, I experimented with a Bay Area recipe to make plum wine. I used:
After about 9 months, we tested our wine, and it was sweet, thick, and delicious! The plums that grow so well here do just fine in flavoring the wine, so I made an even larger batch this year.
If you are looking for a simple, quick recipe to use up unripe plums, this is for you!
2 lbs + 2 oz green, whole, unripe plums
1.75 L Vodka or other clear, flavorless drinking alcohol
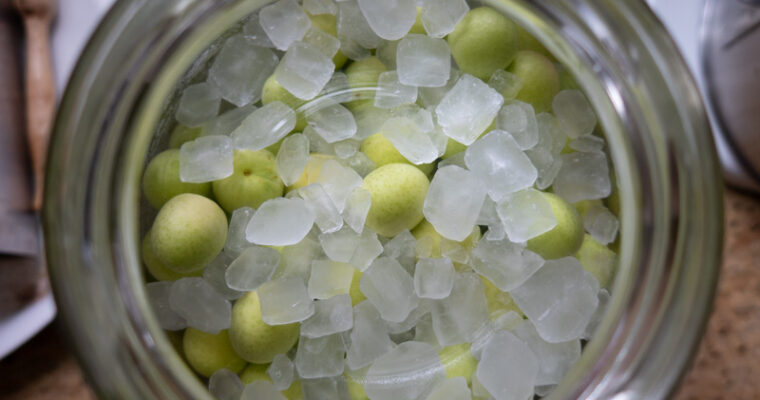
1 lb + 12 oz Rock Sugar (or less, if you prefer less sweetness. I recommend no less than 1 lb)
A large, clean, glass gallon jar (I used a Costco-sized pickle jar)
What if I want to make a smaller amount?
To make plum wine in a quart-sized glass jar, use these ingredient measurements:
1/2 lb green, whole, unripe plums
.4 L (about 15 oz) Vodka or other clear, flavorless drinking alcohol
7 oz Rock Sugar
Why Rock Sugar and not regular sugar?
Rock sugar will take longer to melt into the vodka, slowly adding sweetness just as the plums’ flavors are slowly extracted. While you can use regular sugar, it was not recommended by any recipes I found. Also, rock sugar looks cooler.
Where can I buy Rock Sugar?
Any local pan-Asian market should carry rock sugar. I recommend using the white variety, since it will not add additional color to the wine. I found mine at the Ranch 99 in Daly City (store website) labeled “White Lump Candy.”
Rock Sugar is available online as well, but is way more expensive. A pound of Rock Sugar from Ranch 99 was under $3, but online it is rarely under $5/lb and then you have to pay for shipping.
Can I just buy unripe plums?
There are Japanese markets that will seasonally (usually in May) sell actual Umeshu plums for making wine. These do require a bit more work, as they need to have their stem areas removed, but they are also larger plums.
It is awesome when your child takes an interest is gardening, especially if it’s something you yourself are into. You want to give them every positive experience: the crunch of a freshly plucked sweet pea off the vine, that indescribable smell of tomato vines on …
As the rain pours down on a dreary afternoon, I find myself longing for those warm, dry days when going into my garden didn’t feel so muddy and gross. Remembering the extremely tumultuous–and hot–summer and fall of 2020, I can reflect on what worked and …
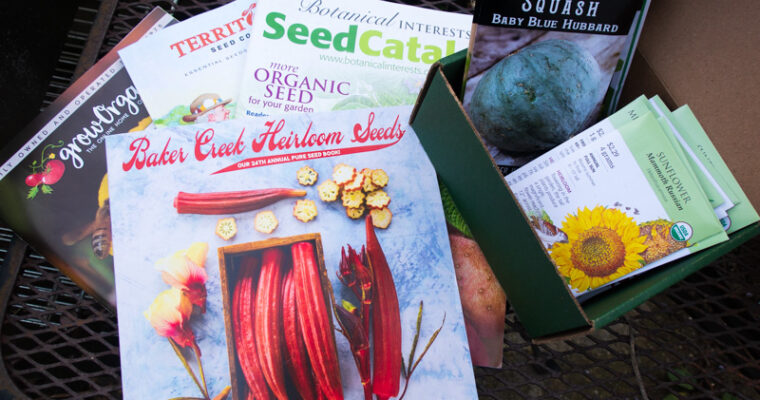
I’m not gonna lie: Seeing the mailbox packed with color seed catalogs is one of my favorite parts of the holiday season.
What is more hopeful, positive, and bursting with potential than a listing of plants and flowers you could grow? And from tiny seeds, no less? Retail therapy, indeed!
Obviously, I don’t get every seed catalog available delivered to my home. I get a small pile of ones I tend to purchase from regularly, and each has its positives and negatives. This is my take on this year’s offerings from my favorite seed suppliers.
This is always my go-to company for seeds for my garden, and their catalog this year is reflective of why that is.
Instead of photographs, they use drawings for each variety of seed. That means you usually see the fruit and the plant in its most desired form. The drawings are dead-on and perfect. No bad lighting or weird camera angles will make you unclear about the exact variety you are choosing. And, each and every variety gets a picture in the catalog.
The info on each variety is clear and concise, just like their informative seed packets. When I just want to choose seeds and buy them without much fuss, Botanical Interests is the way to go.
They give extra attention to the new seeds for the year on the first spread, making it easy to find the most exciting items first. There’s helpful information throughout about various subjects. This year, they explain the difference between Conventional and Organic seeds.
The paper catalog can be requested via this link, or you can view it online: Botanical Interests Catalog
If you’d rather shop locally, I know that I found a huge selection of Botanical Interests seeds at Golden Nursery in San Mateo and FlowerCraft in San Francisco, but it has been a while, so I would call them to check before you head over!
When I am actively avoiding the cold, wet weather of the Bay Area’s winter, I love to curl up under a blanket with a hot cocoa and the Baker Creek Heirloom Seed catalog. Something about the long, historically-minded seed descriptions and bizarre random family photos make me feel like I’m living on a homestead in the wilderness and not trapped in a Covid-fueled never-ending-family-only-hellscape.
This catalog is not for a quick perusal. Get your reading glasses and plan to learn first-hand why professional graphic designers try to avoid having too many words per line in a paragraph. Some of the descriptions are only a few sentences, and some are half-pages of text about the history, uses, and cultural significance of a particular type of Chinese Cabbage or Amaranth.
It’s perfect to have these long descriptions because unless you already get the catalog every year, you might not have heard of many of these plants. The descriptions make you want to know these plants–to try them and grow them and look half as happy as the children in some of the pictures.
Something unique to Baker Creek’s catalog, besides the hard-to-find and new-to-America seeds, is that they do not separate vegetables from flowers. Partly, that’s a brilliant way to convince those of us on one side of the fence or the other to experience the incredible lure of the other. And partly it’s also because the line between food and flora is a thin one. On at least half the plants I’d call “flowers,” Baker Creek talks about the number of antioxidants it contains or explains how to use it in smoothies or baked goods like the Hopis used to.
The 2021 Catalog isn’t all that Baker Creeks puts out–they also have a Whole Seed Catalog for which they charge $13. It includes even more amazing photos and seed varieties. To request the catalog, view it online, or purchase the Whole Seeds Catalog, go here: Baker Creek Heirloom Seeds
When Covid is less of a threat, be sure to make your way to the Petaluma Seed Bank to buy seeds and gawk generally at the amazing collection in person.
With a massive collection of seeds, it’s amazing they can get it all into one book. So much variety for every vegetable and flower, plus the option to purchase 1 oz of seeds or 50 lbs of some seeds, makes it worth a look.
The quality of seeds is great, the diversity is amazing, and the extras, like gardening supplies and fertilizers they also sell are great. It’s just…the catalog is very utilitarian. It reminds me of Burpee catalogs.
As a company, I think they cater to more serious farmers along with home gardeners, so this makes sense. But for an escape into the dreams of a robust garden in the spring, it lacks imagination.
You can request a 2021 catalog here: Territorial Seed Catalog Request Form
With a focus on only organic seeds and a huge collection of other products, including garlic, potatoes, and fruit trees depending on the time of year, I always look forward to the many focused catalogs from California-based Peaceful Valley/GrowOrganic.com.
Like Botanical Interests, Peaceful Valley uses drawings of their offerings, but the drawings are more artistic: think clever camera angles. I prefer the scientific precision of Botanical Interests over these drawings for seed purchasing, though I do appreciate the art. The variety of offerings is sufficient for most home vegetable gardeners, but if you’re looking for something new and exciting, this may not be the catalog for you.
One awesome thing to note is that Peaceful Valley offers free shipping for seeds if you buy at least 5 packets. If you’re looking to stock up for spring with organic seeds, this would be the place. They also occasionally offer free seeds with larger purchases of gardening equipment or materials.
And, while I might not love their seed catalog offering, I will be waiting excitedly for their 2021 Bare Root Catalog–I’m thinking this may be the year to get that Persimmon Tree!
View all catalogs online: Peaceful Valley/GrowOrganic.com Catalogs
Is there an awesome seed catalog you love to comb through every winter? Please tell me about it in the comments!
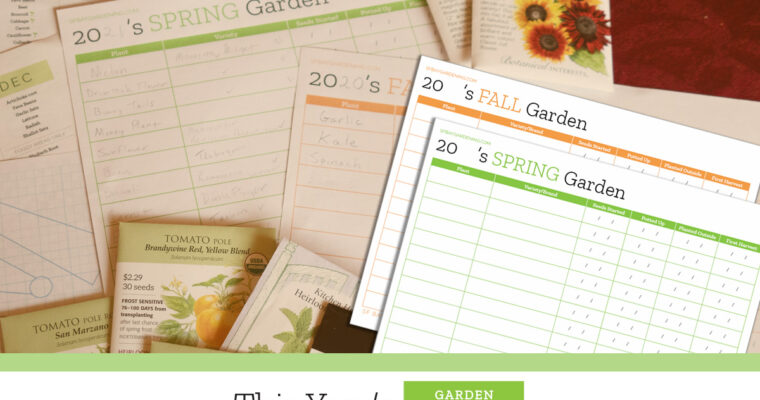
About this time every year, I start to get super excited. The evenings get dark earlier, the air is a bit cooler, and it’s that time of year when the garden gets quiet. Time to start planning for next year’s garden! I’ve planned my gardens …
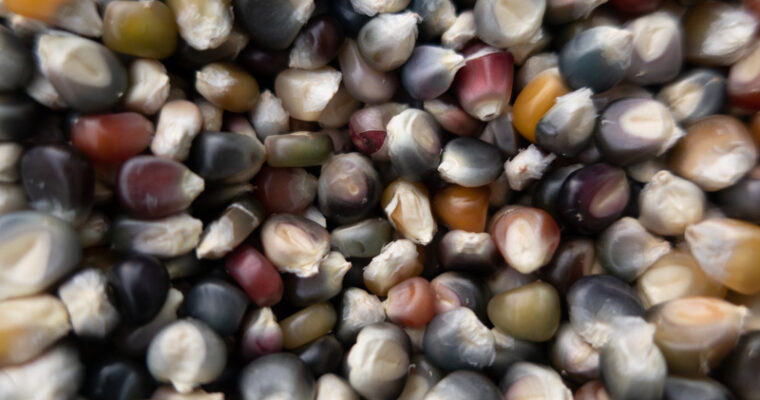
It’s been making the internet news cycles again: Glass Gem Corn (or Glass Gem Popcorn). It is definitely beautiful, and, in the sunnier parts of the Bay Area, easy to grow.
Glass Gem is a flint corn, meaning it is intended to be harvested and used when dried, not fresh. To some, that means waiting longer to use it, but for me, it means I can be super-lazy and leave it on the stalk forever before I even THINK about picking it. Fresh corn is stressful to me–you want to get that perfect moment of ripeness and then run (don’t walk!) it to a pot of boiling water. Flint corn is way more forgiving and involves less cardio.
As a flint corn, you can use Glass Gem for decoration, but also grind it for [cornmeal or flour], or pop it (more on that later).
N.B. these instructions will work for most corn up to the Harvesting section, which is specific to flint or dent (dry) corn.
Growing corn in the Bay Area is a lot like growing it anywhere else. You plant as soon as you can and hope you get a solid season in. If you look at my Planting Calendar you’ll see I only ever say “early corn.” In most of the foggy areas, only early corn (i.e. short season corn) will have time for a full growing season given the lack of truly hot days. In the sunny areas, you can read that as just “corn,” but be sure to get those seeds in the ground in April, May, or June. I planted in late May last year, and didn’t harvest until late October. That’s far past the “110 Days” on the seed packet. Less guaranteed sunny days means more time to mature.
Choose a full-sun spot in your garden that is protected from wind, if possible. Corn stalks, because of their height, can be knocked down.
You’ll want to plant corn into the ground directly–it does not like to be transplanted. Seeds should be planted between 1″ to 2″ in the soil, and each seed hole should be 12 inches from any other. You can absolutely plant corn in rows or circles, but make sure that they are not in one continuous line. Corn stalks will need to be next to other corn to fully pollinate. I like to plant mine in rectangular or square blocks to maximize pollination, and also to let the stalks protect each other from wind.
As you keep the planting area well watered, you will see spouts that look like grass (corn is a grass, so this is not just a coincidence!) pop up after about a week. If you like to plant two or more seeds per hole, you may see two little corn sprouts. I’m sorry, but you need to choose your favorite and either ever-so-carefully pull out the other from the soil or snip it off at the soil level. Two corn stalks will never grow well in one space.
Unless you find a lot of grasshoppers in your yard, your corn should be fairly pest-free as it grows to full size. Ants don’t bother it too much, so don’t freak out if you see them exploring the stalks.
Keep your corn patch well watered. If you have high winds blow through, and one of the stalks falls over, pick it back up and support it as best you can immediately after.
As your corn gets taller, you will start to notice some growth in addition to the leaves: proto-corn ears with silky tassels, and flower stalks (note, these are not necessarily the official terms, but are what I call them). Each of the silk tassels on each potential ear correspond to a single kernel. So, each piece of silk must be visited by a mote of pollen from the flower stalks. Light winds on a dry day can help this process along, but you can also gently tap the flower stalks on a dry but windless day to release the pollen gently down to the tassels.
Now that you have pollinated corn ears, you have a new challenge, depending on the critter profile of your garden.
Raccoons love corn. If they discover your corn, they have been known to steal a whole yards’ worth in a few nights. One solution to this issue is duct-taping ears to the stalk. That’s a little too much in opposition to my garden’s rustic aesthetic, so I like a more natural approach: blackberry brambles. I have still never fully tamed my wild Himalayan Blackberry brambles, so I have plenty of thorn-encrusted branches around to place in and around my corn. Raccoons do not like to chance hurting their tiny paws, and so far, although I’ve lost countless unprotected grape harvests to those sly bandits, I have yet to have one ear of corn stolen from a “thorned” cornstalk.
There are some diseases that infect corn and can ruin some ears. Corn smut can infect whole ears, but is rare, while aphids, which are prevalent, usually only mess with the very tops of the ear so are less to worry about. I myself have never seen corn smut or any devastating disease on my flint, fresh, or popcorn grown here.
Unlike corn that is eaten fresh, flint corn like Glass Gem does not need to be harvested right away when the silks are dried up. You get to let your corn stay on the stalk until the husks turn yellow and dry out. In the SF Bay, the only imperative to be aware of is to harvest before the rains are steadily hitting us. Mold will take effect if the weather is too wet, so be sure to get those ears inside before that happens.
Once you’re harvested, you will probably want to open those husks right away to see the amazing display of gorgeous glowing kernels–and you TOTALLY SHOULD! Ooh and aww over the different varieties you see in just your own harvest. It really is amazing. Just remember to leave the dried husks on each ear!
Now, what to do with those beautiful cobs? Before you go and start popping kernels, you could take some time to create autumn decorations from three kernels tied up with a bow, or go totally all out with a corn wreath.
I used a flat MDF craft wreath ring I purchased at a craft store and rubber bands and stretchy hair ties to attach the cobs.
To get the kernels off of the cobs is a bit of a job, I’m not going to lie. One of the best ways to remove the kernels is to take one ear in each hand (aren’t you glad you left the husks on to help you hold them?) and start rubbing them together over a large bowl or stock pot. In a vegetal contest of wills, one of the ears in your hand will start to give up kernels, and you should direct the other ear to force the kernels off the other. I made my kids help, and even took some to the preschool to let the little kids try it. Most of them could do it, for at least a little while. The kernels get EVERYWHERE, and kids love that bit especially.
Once you have painstakingly separated the kernels from the cobs, you will find all sorts of fluffy pieces of dried corn silk and husk mixed in with the corn. This is not ready to be popped as-is, since the papery detritus will burn in a corn popper. To remove it, you get to act like a real old-fashioned farmer and use a light wind (or a fan on low) to “winnow” the corn from the rest of the material. Get two large containers, and, from a modest height above one container, pour the corn from the other container. The wind should catch the lighter material and blow it away, letting only the corn fall in to the lower container. You will need to repeat this multiple times to get rid of most of the unwanted material. Once you can pick up handfuls of kernels and don’t see anything BUT corn kernels, you should be good to go!
This variety of corn is sold as “popcorn” by a few seed companies, and it definitely does pop.
I use my air popper to make it, as the microwave-bowl-style does not work with this corn. I have yet to try the stovetop/oil method, which may also work well. Having harvested almost a year ago, and using the air popper, I still get close to a 100% pop rate (but, there are quite a few “half-popped” kernels that I would call “unpopped” because I don’t want to chip a tooth. If you love half-popped popcorn, then this is the variety for you!).
You will see multiple colors in the popped kernels, but it’s a small range that goes between “yellowy-white” and “is that bluish?” The popcorn is very tasty, and seems to have more heft and chew to it than typical popcorn–I’d go as far as to say it is more “meaty” than normal popcorn. It may be just that it doesn’t pop as fully as regular popping corn, but the flavor is also somewhat more in the direction of corn-y products like cornbread.
If you are looking solely to grow your own popcorn, I’d say find a better “popping” variety. If you want a spectacular show when you harvest and a fun, tasty treat later, then definitely give Glass Gem Corn a try.
The following are all available from Botanical Interests
Glass Gem
Other popcorn varieties
There are tools that I bring into the garden with me, like a shovel, clippers, and gloves. These things are meant to get dirty or wet. Gardens are not “clean” places. For that reason, I find it very difficult to have my reference materials, like …